You know, sometimes you just crave that super tender, melt-in-your-mouth beef that feels like a warm hug on a plate. That’s exactly what you get with a pot roast! But have you ever thought about giving it a little Korean flair? My Korean Style Pot Roast takes everything you love about the classic comfort food and gives it this incredible savory-sweet, umami-rich twist. It’s become a total go-to in my kitchen, especially when the weather turns cool. I remember the first time I made it, the whole house smelled absolutely divine, and my family practically inhaled it. It’s one of those recipes that just feels special!
Why You’ll Love This Korean Style Pot Roast
It’s packed with savory, sweet, and umami notes from the soy sauce, mirin, and aromatics. Seriously, it’s a taste sensation! Plus, the slow braising process makes the beef unbelievably tender and juicy – it practically melts in your mouth. While it takes a few hours to cook, the actual hands-on time is minimal. Just a bit of prep and then let the oven do the work! This dish is pure cozy goodness, perfect for a Sunday dinner or any night you need a hearty, delicious meal.
Essential Ingredients for Korean Style Pot Roast
Alright, let’s talk about what you’ll need to make this Korean Style Pot Roast absolutely sing! It’s all about balancing those classic pot roast vibes with those delicious Korean flavors. Don’t worry, most of it is pretty standard pantry stuff, with a couple of easy-to-find Korean goodies.
For the Pot Roast
- Beef Chuck Roast: You’ll want about 3 lbs of this beauty. Chuck roast is just perfect because it has enough fat and connective tissue to get super tender when braised low and slow.
- Vegetable Oil: Just 2 tablespoons to get a nice, golden sear on that roast.
- Onion: One large onion, quartered. It’ll soften up and add a subtle sweetness.
- Garlic: Four cloves, smashed. No need to mince, just give ’em a good whack!
- Ginger: A one-inch piece, sliced. This adds that lovely zingy warmth.
For the Braising Liquid
- Beef Broth: One cup, the savory base for our sauce.
- Soy Sauce: Half a cup. This is where the main savory punch comes from!
- Mirin: A quarter cup. This is that sweet rice wine that adds a gorgeous depth and gloss.
- Brown Sugar: Two tablespoons. Just a touch more sweetness to balance everything out.
- Sesame Oil: One tablespoon. A little goes a long way for that nutty aroma!
- Black Pepper: One teaspoon, for that perfect little kick.
For Serving (Optional, but highly recommended!)
- Scallions: Chopped, about a quarter cup. For a fresh, oniony bite and a pop of green.
- Toasted Sesame Seeds: One tablespoon. Because everything is better with toasted sesame seeds, right?
Equipment Needed for Your Korean Style Pot Roast
Okay, so you don’t need a whole gourmet kitchen for this one! Honestly, a good heavy-bottomed pot is your best friend here. We’re talking about a trusty Dutch oven – mine is a cast iron beauty that just transfers heat like a dream. You’ll also want some sturdy tongs for handling that big hunk of beef, a sharp knife, and a cutting board for prepping your ingredients. That’s pretty much it!
Step-by-Step Guide to Making Korean Style Pot Roast
Alright, let’s get this amazing Korean Style Pot Roast cooking! It’s not complicated, promise! It’s all about building those incredible flavors layer by layer. Trust me, the smell alone will have everyone gathering in the kitchen. If you’re interested in other Korean flavors, their pancakes, called Pajeon, are absolutely divine!
Preparing and Searing the Beef
First things first, let’s get that oven preheated to 325°F (160°C). While it’s warming up, grab your beef chuck roast and pat it *really* dry with paper towels. This is super important for getting a good sear! Season it generously all over with salt and pepper. Now, heat up your Dutch oven with that vegetable oil over medium-high heat. Once it’s nice and hot, carefully place the roast in and sear it on every single side until it’s a deep, gorgeous brown. Don’t rush this part; this browning is where so much flavor comes from! Once it’s beautifully seared, take it out and set it aside for a minute.
Building the Flavor Base
See that stuff left in the bottom of the pot after searing? That’s pure gold! Toss in your quartered onion, smashed garlic cloves, and those sliced ginger pieces. Let them cook and soften up in that beefy goodness for about 5 minutes, stirring now and then. Oh, the aroma that starts to fill your kitchen is just incredible! While those are getting fragrant, quickly whisk together your braising liquid ingredients in a little bowl: the beef broth, soy sauce, mirin, brown sugar, sesame oil, and black pepper. It smells so good already!
Braising the Korean Style Pot Roast
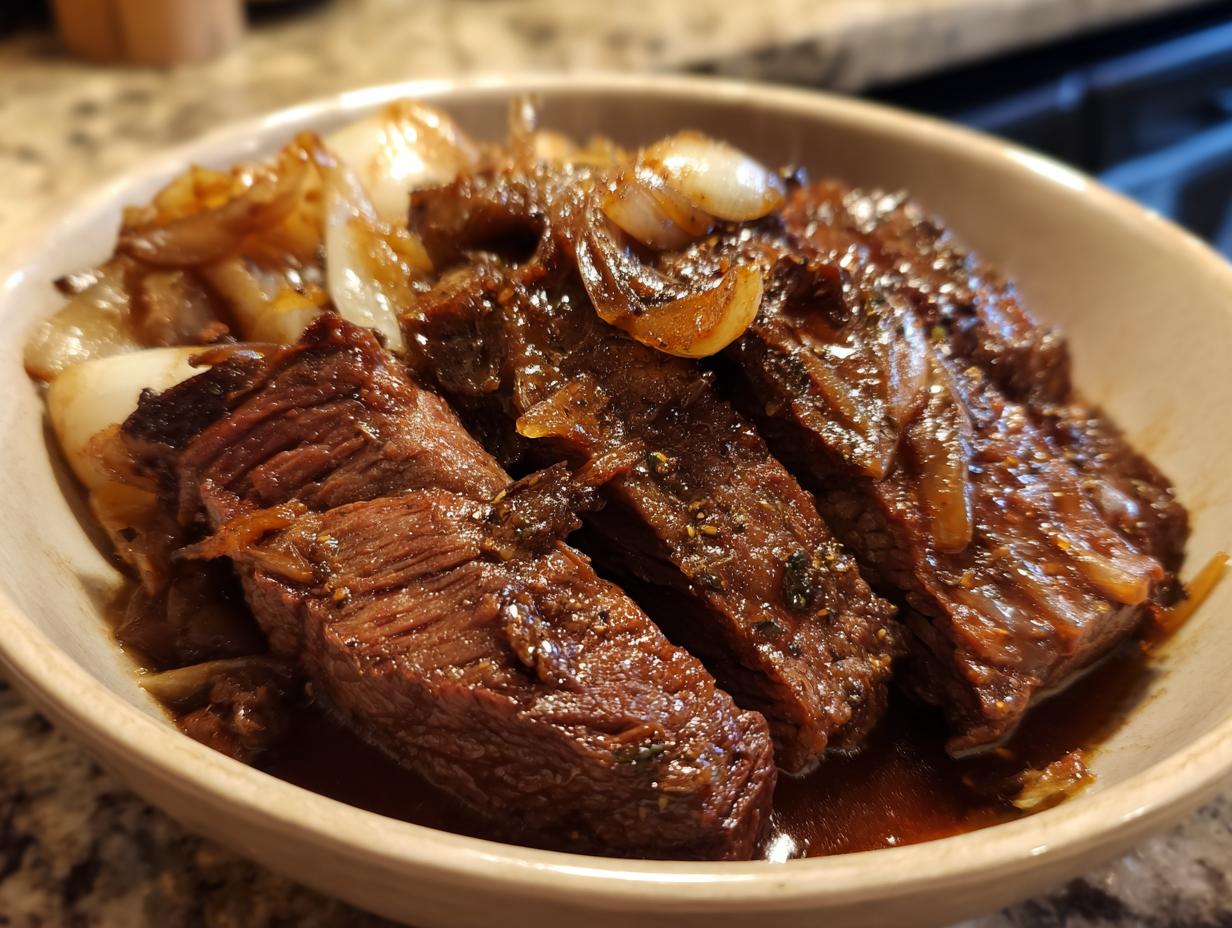
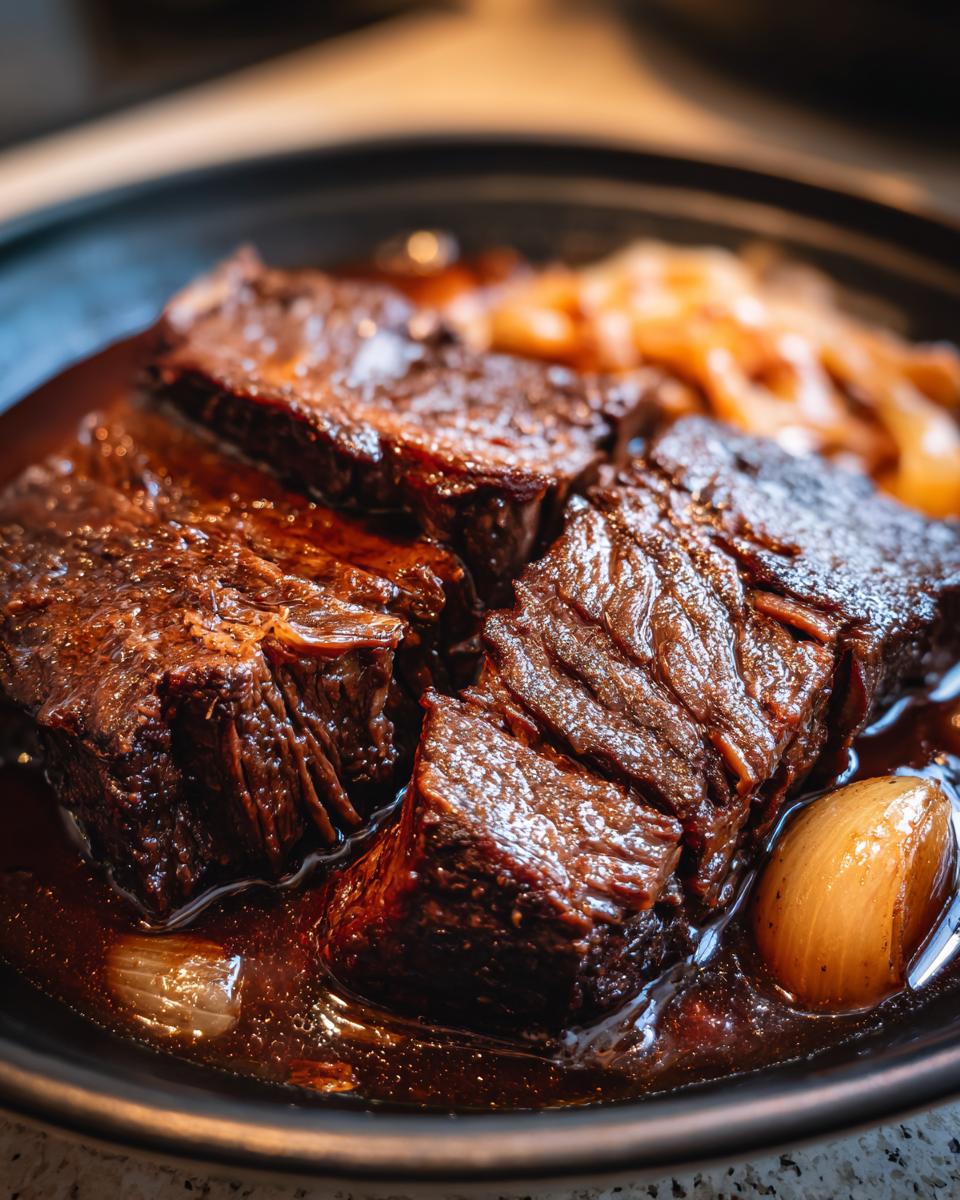
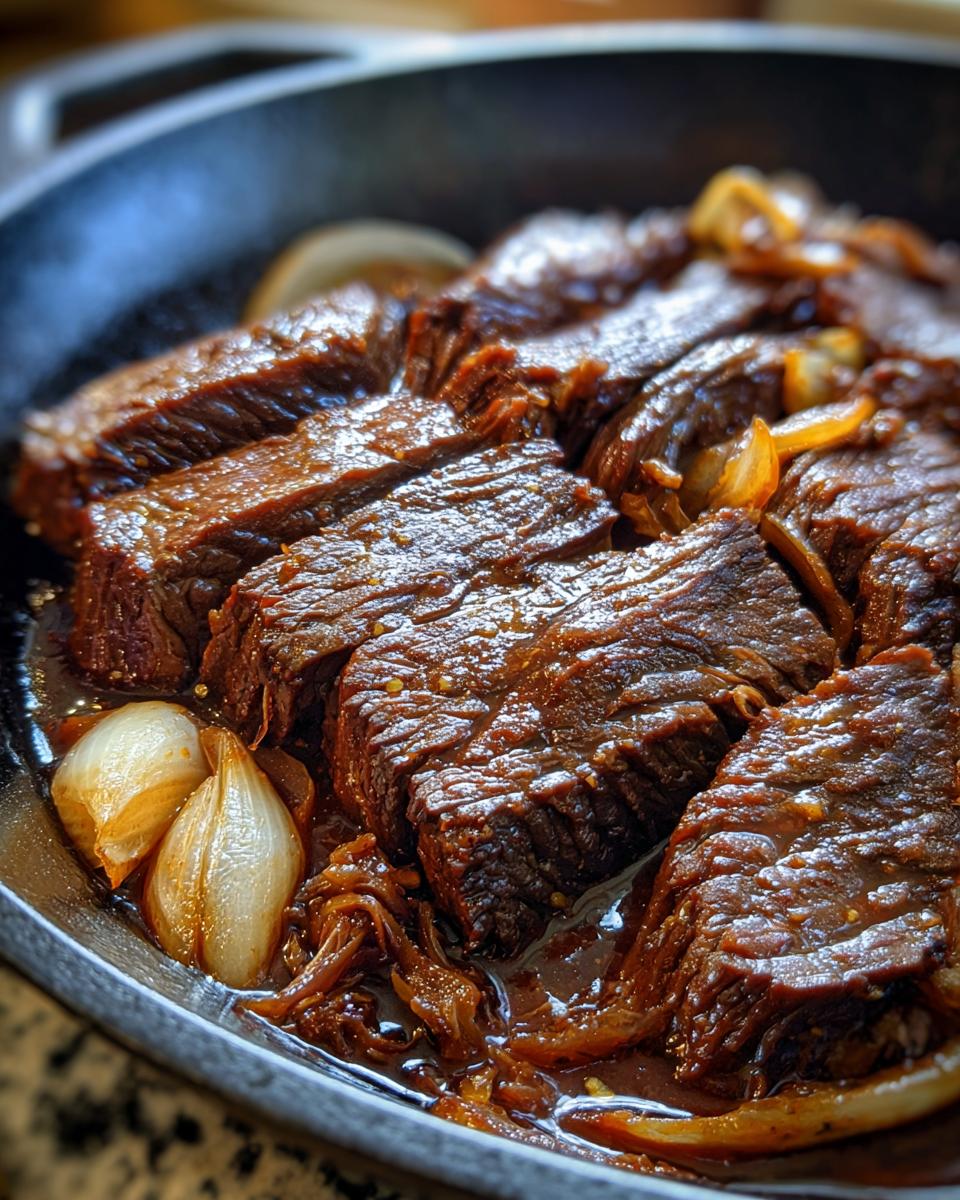
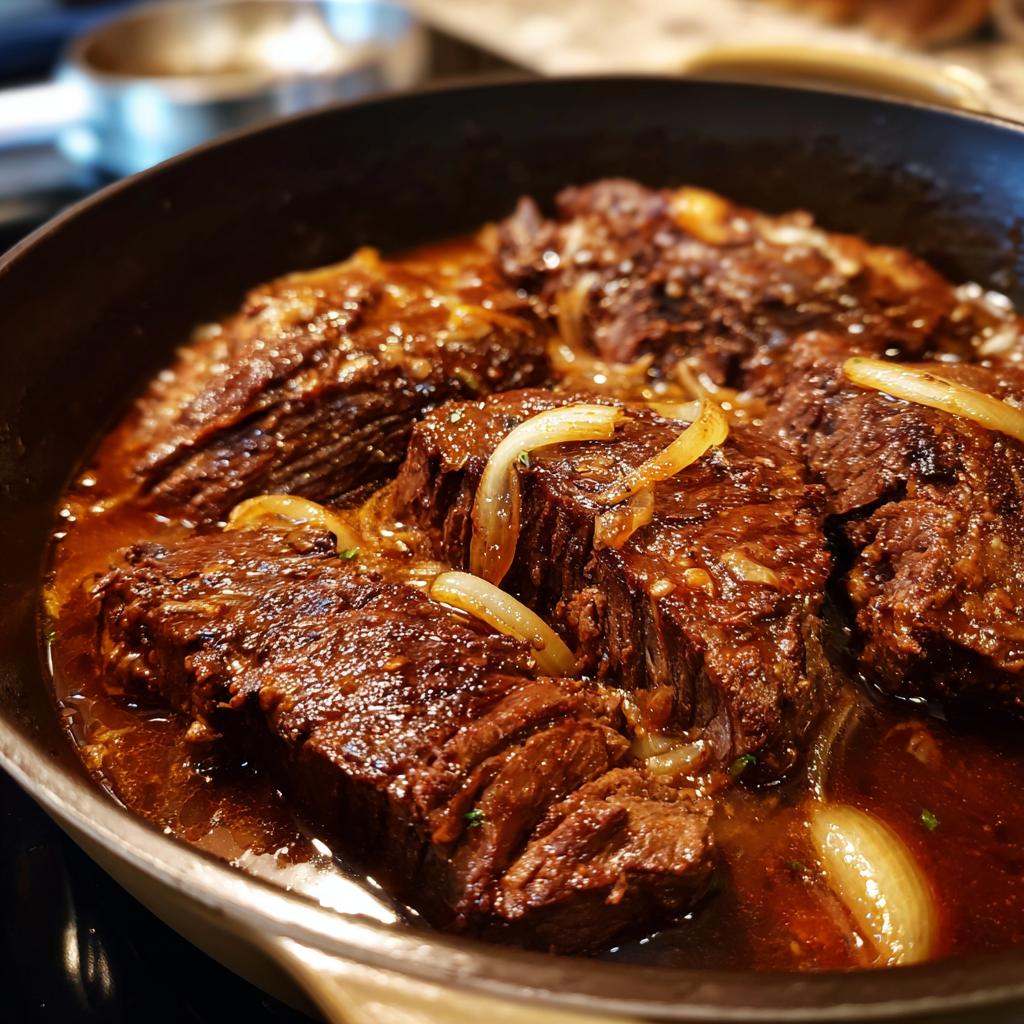
Pop that gorgeous seared roast back into the Dutch oven, right on top of those softened aromatics. Now, pour that wonderful braising liquid all over it. You want the liquid to come about halfway up the sides of the roast – don’t drown it! Put the lid on nice and tight. This is where the magic really happens. Carefully place the whole Dutch oven into your preheated oven. Let it braise away for about 3 to 3.5 hours. You’ll know it’s ready when the meat is so tender you can easily shred it with a fork. It’s like a slow, delicious transformation!

Resting and Serving Your Pot Roast
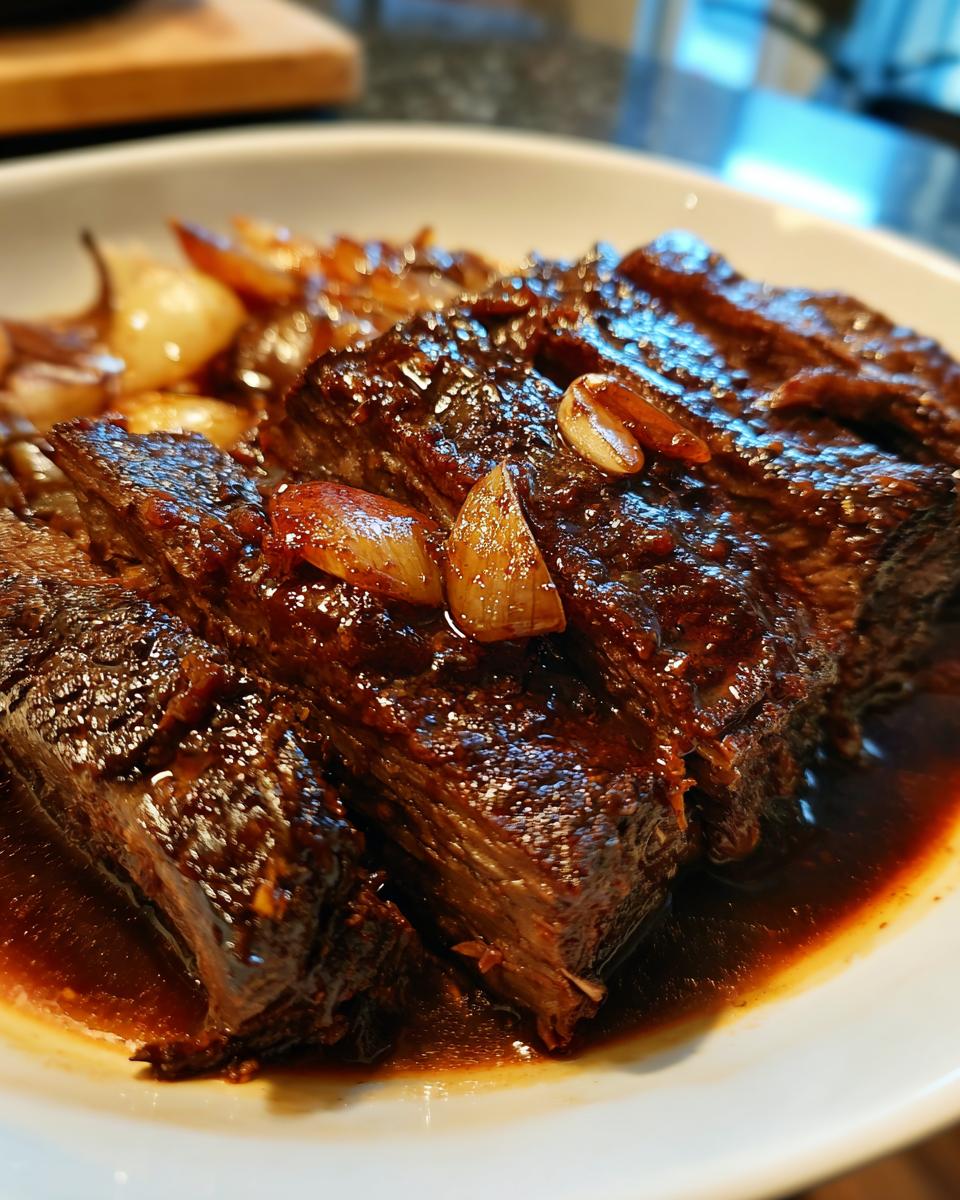
Okay, the beef is perfectly fork-tender (yay!), but don’t skip this crucial step! Carefully lift that beautiful roast out of the pot and place it on a clean cutting board. Tent it loosely with some foil and let it rest for at least 30 minutes. This lets all those juicy flavors redistribute throughout the meat, making it even more tender and delicious. While it’s resting, you can skim off any excess fat from the braising liquid and even reduce it a bit on the stovetop if you like a thicker sauce. Strain all those solids out to get a nice, smooth sauce. Once rested, slice your pot roast against the grain, drizzle with that amazing sauce, and sprinkle with fresh scallions and toasted sesame seeds if you’re feeling fancy. Enjoy!
Tips for the Best Korean Style Pot Roast
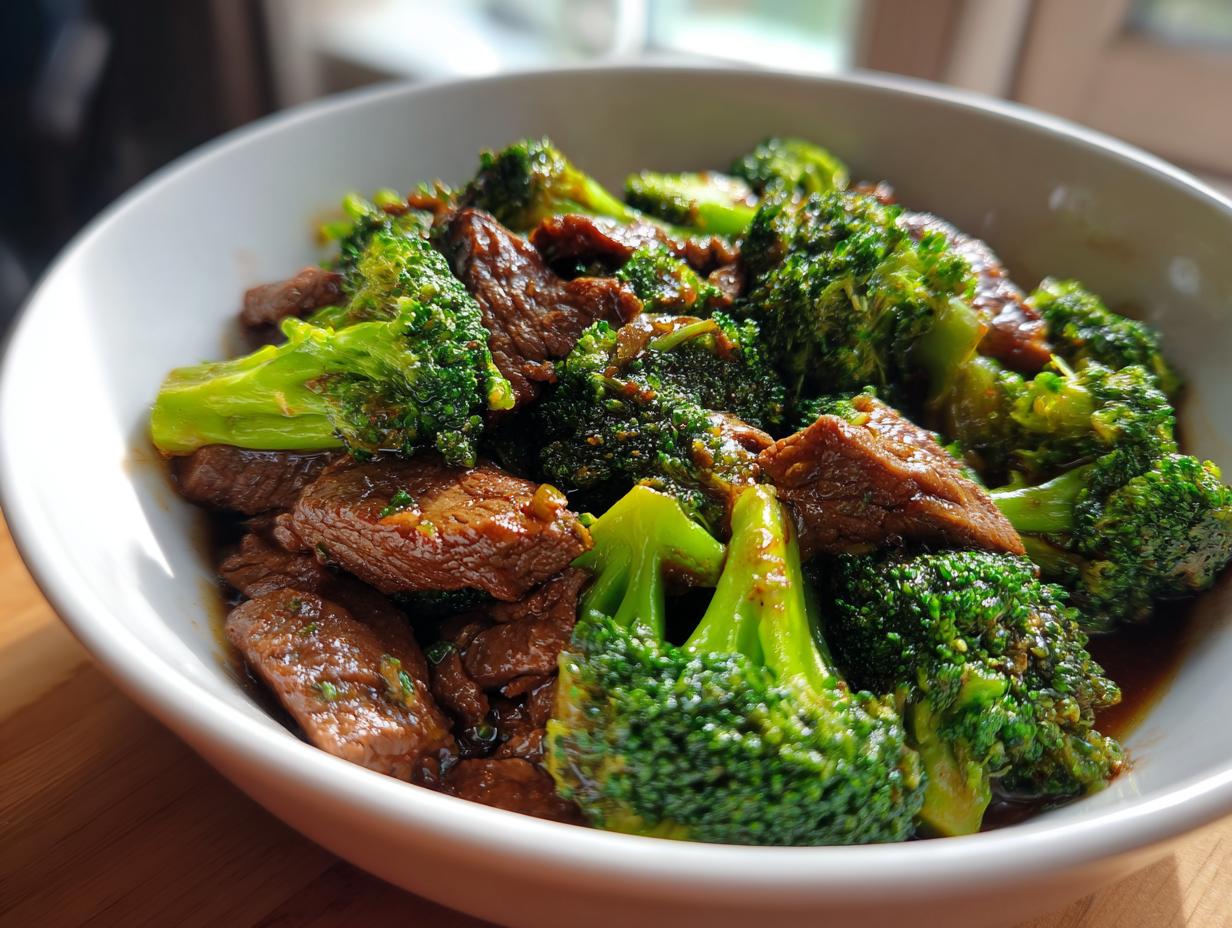
Okay, so you want that Korean Style Pot Roast to be absolutely perfect, right? I’ve made this so many times, and I’ve picked up a few tricks along the way that really make a difference. First off, don’t skimp on searing that roast! Seriously, that deep brown crust is where all the magic starts, giving you so much flavor. For the braising liquid, feel free to play around a little! If you can’t find mirin, a dry sherry or even a little extra rice vinegar mixed with a pinch of sugar can work in a pinch, though mirin is pretty special. And if you’re not a fan of the beef broth, a good quality chicken or vegetable broth will do in a bind. For extra flavor, try adding some mushrooms or even a whole pear to the pot while it braises – they get super tender and add a lovely sweetness. Oh, and if you’re a fan of other Korean flavors, you’ve got to check out my Korean Ground Beef Bowl; it’s another quick win!
Ingredient Notes and Substitutions
Some of these ingredients might be new to you, but they totally make this Korean Style Pot Roast shine! For instance, mirin is a sweet Japanese rice wine that gives our braising liquid that beautiful gloss and a subtle sweetness that you just can’t get from regular sugar alone. If you absolutely can’t find it, you can try using dry sherry or even some white wine vinegar mixed with a bit of sugar, but trust me, try to find the mirin!
Frequently Asked Questions about Korean Style Pot Roast
Got questions about making the best Korean Style Pot Roast? I’ve got you covered! For more tips and variations, you can always check out my original Korean Style Pot Roast recipe.
What is the best cut of beef for pot roast?
For a truly fork-tender pot roast, you want a cut that has a good amount of marbling and connective tissue, like beef chuck roast. This breaks down beautifully during low and slow cooking, making the meat super tender and flavorful.
Can I make this Korean Style Pot Roast in a slow cooker?
Absolutely! You can totally adapt this recipe for a slow cooker. Just sear your beef and sauté the aromatics on the stovetop first for the best flavor, then transfer everything to your slow cooker. Cook on low for 6-8 hours or on high for 3-4 hours, or until the beef is super tender.
How do I know when the pot roast is done?
The easiest way to tell is by its tenderness. When the beef is ready, it should be incredibly tender and easily shred or fall apart with a fork. You shouldn’t have any resistance when you try to pierce it. It’s that melt-in-your-mouth texture we’re going for!
Nutritional Information Disclaimer
Just a heads-up, the nutritional information for this Korean Style Pot Roast is just an estimate. It can really change depending on the exact ingredients you use, the brands you pick, and how you prepare it. So, think of it as a rough guide!
Share Your Korean Style Pot Roast Experience!
I really hope you give this Korean Style Pot Roast a try! It’s become such a favorite in my house, and I’d absolutely love to hear what you think. Did you make any fun tweaks? How did your family like it? Drop a comment below, leave a rating, or even tag me in your photos on social media – seeing your creations makes my day! You can find more inspiration for similar dishes over at my original recipe post. Happy cooking!
Korean Style Pot Roast
Ingredients
Equipment
Method
- Preheat your oven to 325°F (160°C).
- Pat the beef chuck roast dry with paper towels and season generously with salt and pepper.
- Heat the vegetable oil in a Dutch oven over medium-high heat. Sear the roast on all sides until deeply browned, about 3-4 minutes per side. Remove the roast from the Dutch oven and set aside.
- Add the quartered onion, smashed garlic, and sliced ginger to the Dutch oven. Cook, stirring occasionally, until softened and fragrant, about 5 minutes.
- In a small bowl, whisk together the beef broth, soy sauce, mirin, brown sugar, sesame oil, and black pepper.
- Return the seared roast to the Dutch oven. Pour the braising liquid over the roast. The liquid should come about halfway up the sides of the roast.
- Cover the Dutch oven tightly with its lid and transfer it to the preheated oven. Braise for 3 to 3.5 hours, or until the roast is fork-tender.
- Once tender, carefully remove the roast from the Dutch oven and let it rest on a cutting board, tented with foil, for at least 30 minutes before slicing.
- While the roast rests, you can skim the fat from the braising liquid and reduce it on the stovetop if you prefer a thicker sauce. Strain the liquid to remove solids.
- Slice the rested pot roast against the grain. Serve with the reduced braising liquid, and garnish with chopped scallions and toasted sesame seeds, if desired.