
Oh, I get it! You want to eat healthy, right? But between work, school pickups, and just *life*, getting a nutritious meal on the table sometimes feels like climbing Mount Everest. I’ve totally been there – those chaotic evenings scrambling for *anything* to feed the crew, with zero time for actual cooking. That’s exactly why I dove headfirst into creating something that made life easier and healthier. It’s all about simple, enjoyable meals you can prep ahead, which is why so many people are raving about Why Everyone Loves This Healthy Meals Recipes (+ Make-Ahead Tips). Seriously, discovering how to make healthy eating a joy, not a chore, and seeing my own kids actually excited about broccoli-stuffed burgers and quinoa salad? That’s what fuels my passion for these kinds of recipes!
Why Everyone Loves This Healthy Meals Recipes (+ Make-Ahead Tips)
Honestly, there’s a reason these recipes are such a hit! It’s not just about eating healthy; it’s about making healthy eating *easy* and downright delicious. We’re talking about meals that taste amazing, pack a nutritional punch, and fit perfectly into your busy schedule. Think vibrant flavors, wholesome ingredients, and the kind of clean eating that actually feels satisfying, not like you’re missing out. I love sharing these because they really work! You can find tons of inspiration on my blog, but the core idea is finding that sweet spot where healthy, flavor, and convenience all come together perfectly.
The Appeal of Make-Ahead Healthy Meals
Let’s be real, who has the time to cook a gourmet meal every single night? Make-ahead meals are total game-changers, especially for us busy bees. The biggest win? You conquer cravings for less healthy options because you already have something amazing ready to go. Preparing meals in advance means more relaxed evenings, less decision fatigue, and consistently making healthier choices without even thinking hard about it. It’s like giving yourself a little gift of time and peace of mind for the week ahead, all while sticking to your healthy lifestyle goals.
Overnight Oats: A Perfect Make-Ahead Breakfast
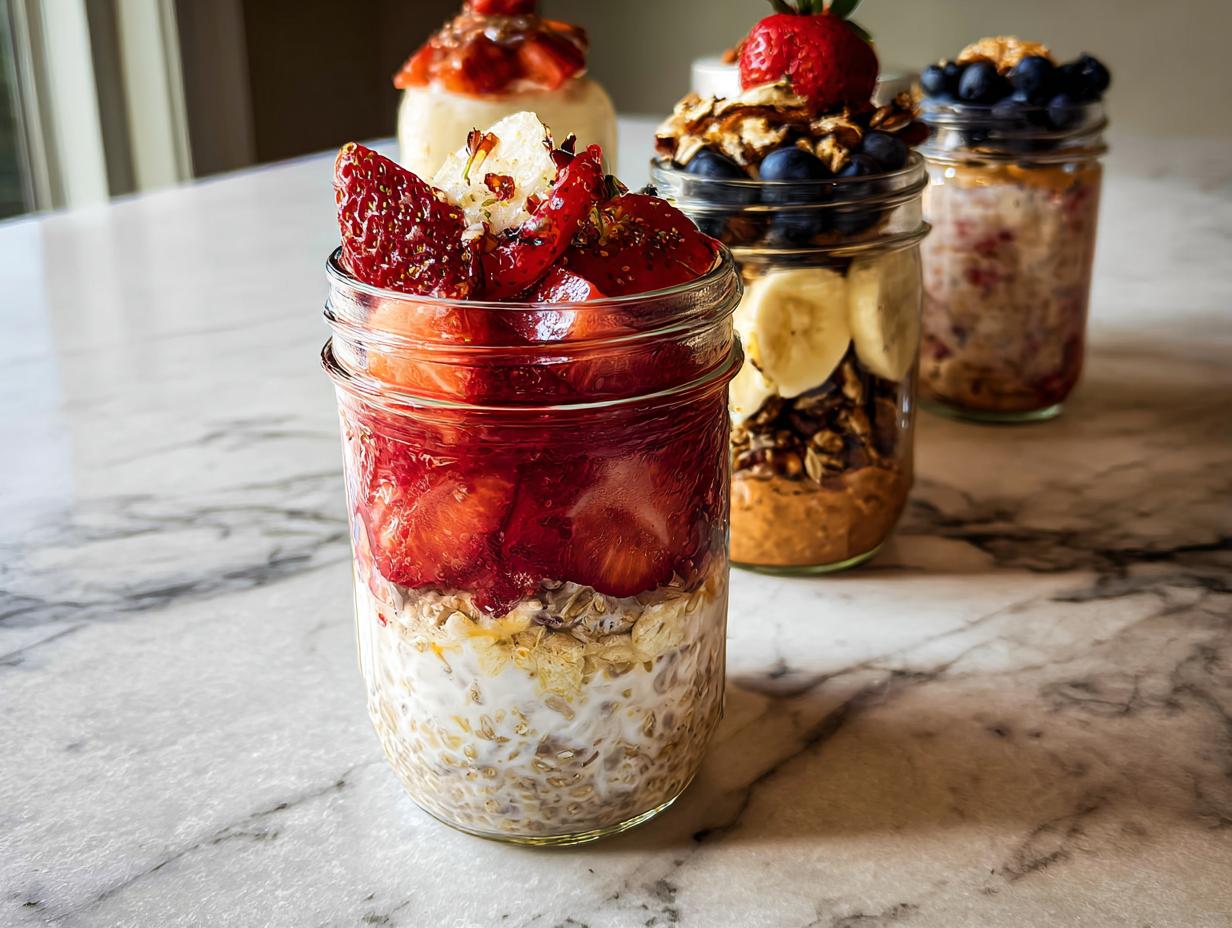
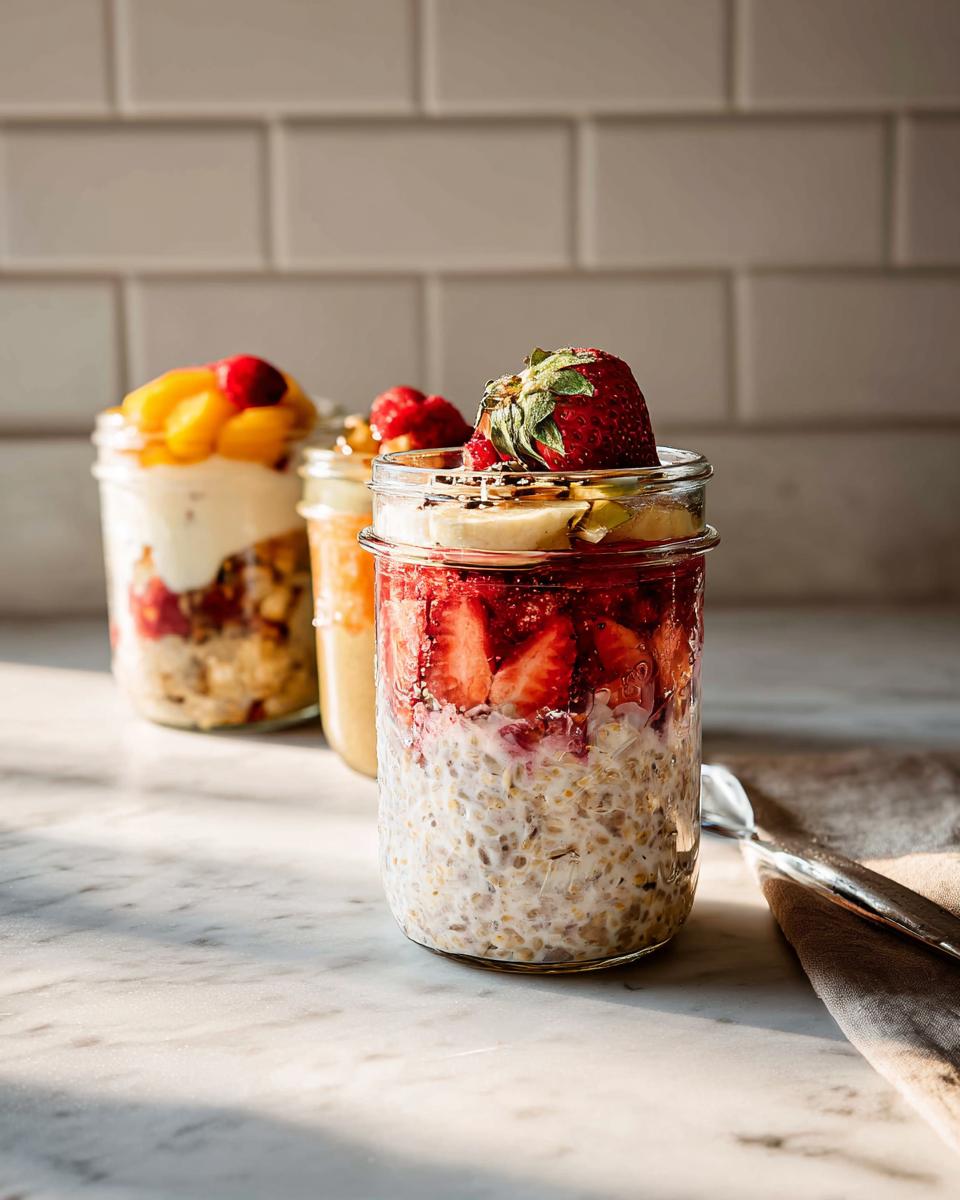
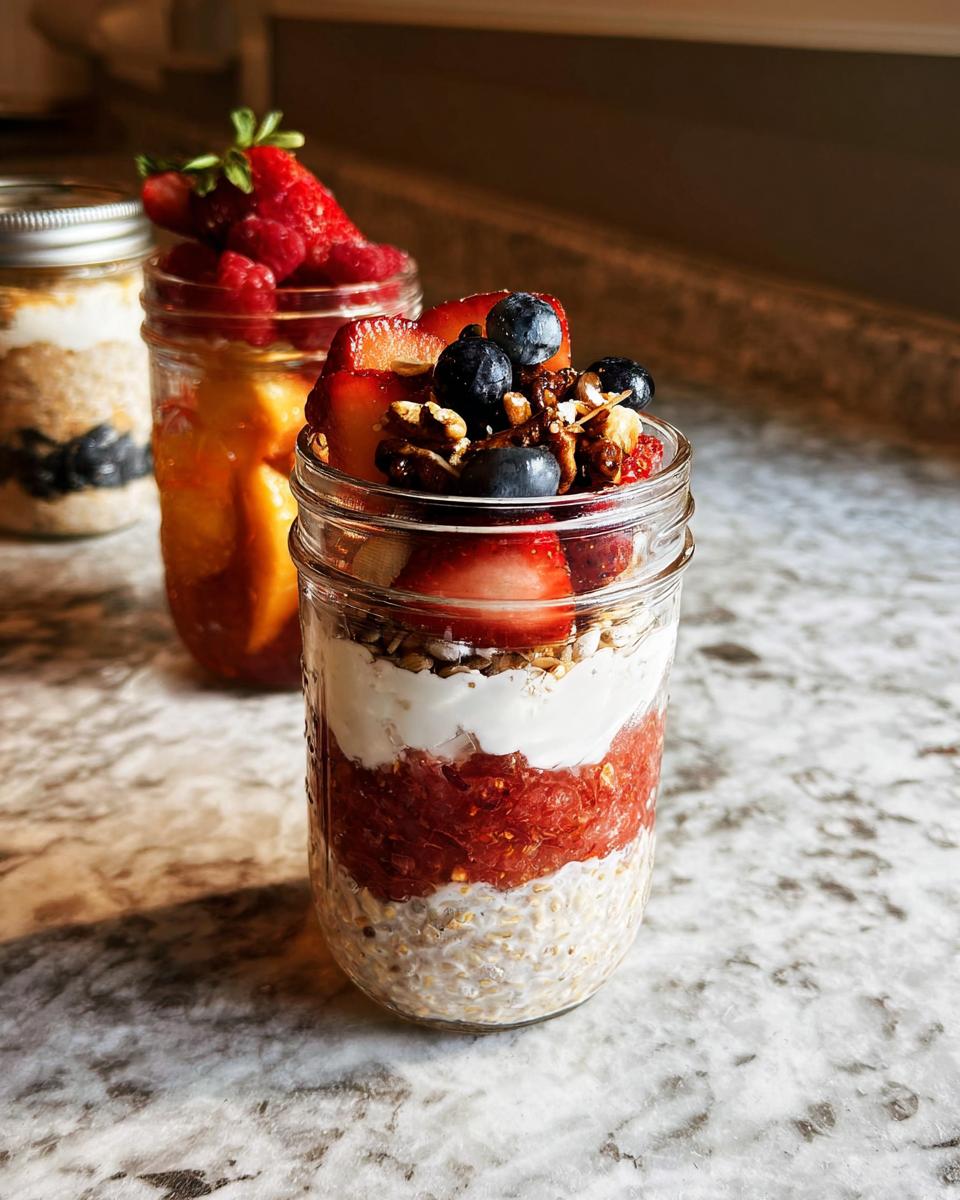
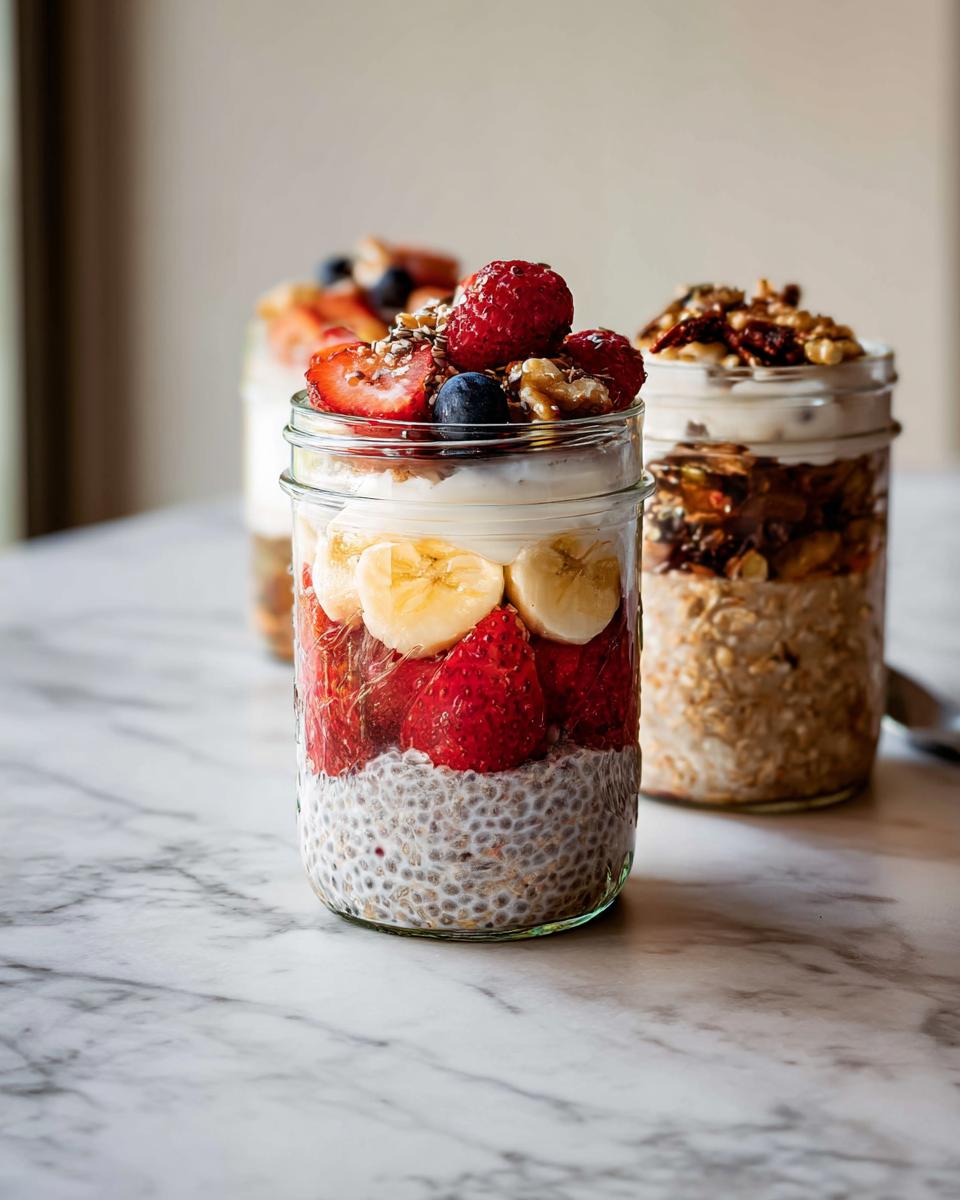
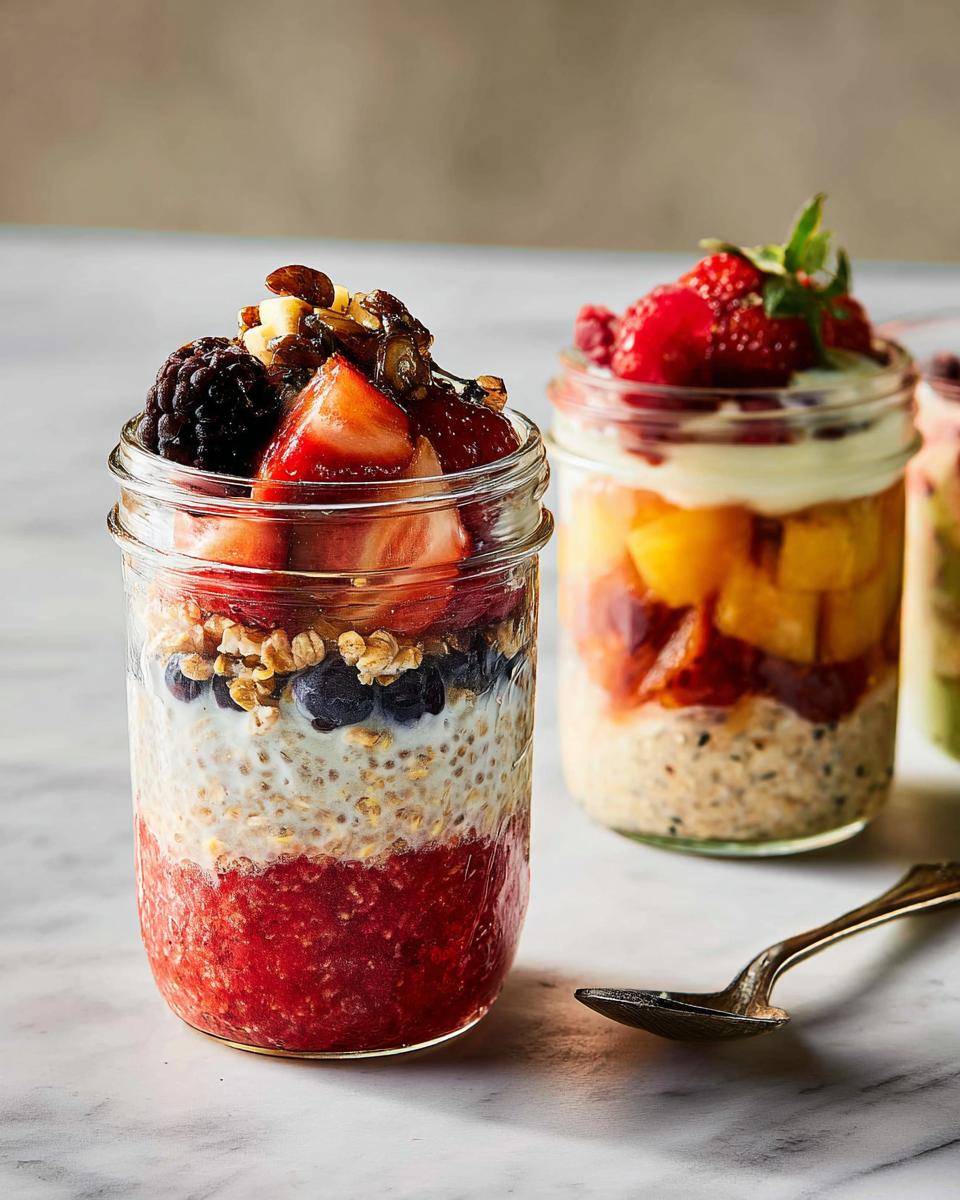
Okay, let’s talk about my absolute go-to for busy mornings: Overnight Oats! Seriously, they are a *dream* when it comes to making healthy eating easy. They tie right back into that whole idea of Why Everyone Loves This Healthy Meals Recipes (+ Make-Ahead Tips) because they’re so simple to prep and incredibly good for you. Packed with fiber from the oats and healthy fats from the chia seeds, they keep you full and energized way longer than your average sugary cereal. Plus, they’re a fantastic way to get some protein in first thing, especially if you add that Greek yogurt. You can find more deets on why oats are so amazing over here, but trust me, you’ll want to whip these up!
Gather Your Ingredients for Overnight Oats
Alright, let’s get everything ready for our delicious base and some fun flavor twists! For the basic setup, you’ll need: ½ cup of whole rolled oats (these give the best texture, not the instant kind!), 1 tablespoon of chia seeds – they’re little powerhouses for thickening and nutrition! Add in ½ teaspoon of maple syrup, just a pinch of sea salt to make all those flavors pop, and if you like it extra creamy, ¼ cup of whole milk Greek yogurt. Then, pour in ⅔ cup of unsweetened almond milk. If you’re feeling adventurous for flavor ideas, we’ve got additions like unsweetened applesauce, cinnamon, diced apples, pecans, peaches, granola, chia jam, peanut butter, berries, bananas, cocoa powder, nutmeg, walnuts, and chocolate chips. Keep these handy!
Crafting Your Perfect Overnight Oats
Making the base is ridiculously easy. Grab a Mason jar or any lidded container you have. Toss in your rolled oats, chia seeds, that little bit of maple syrup, salt, and the Greek yogurt if you’re using it. Now, pour in the almond milk. Give it all a good stir – make sure there are no clumpy chia seeds hiding at the bottom. Pop the lid on tight and off it goes into the fridge! You want to let it hang out there overnight, or for at least 4-5 hours to really get creamy and delicious. In the morning? Boom! It’s ready. Just give it a quick stir, add your favorite toppings, maybe a little extra drizzle of maple syrup, and you’ve got breakfast perfection. You can also check out more ideas for overnight oats here!
Delicious Overnight Oats Variations
Now for the really fun part – turning that simple base into a flavor explosion! These variations are perfect for keeping your meal prep exciting but still super easy. You can totally mix and match, but here’s how I usually whip them up:
Apple Pie Overnight Oats
Just stir 2 tablespoons of unsweetened applesauce and ¼ teaspoon of cinnamon (or apple pie spice!) right into your base mixture before it goes in the fridge. In the morning, top it off with some diced apple, a sprinkle of chopped pecans, and maybe even a few of those cute cinnamon apples you might have made. So cozy!
Peach Crisp Overnight Oats
This one is sunshine in a jar! Make your plain overnight oats base. When you open it up in the morning, pile on some fresh peach slices and a generous spoonful of crunchy granola. It’s like dessert for breakfast, but healthy!
PB&J Overnight Oats
Who doesn’t love PB&J? For this, make the plain base. In the morning, swirl in a spoonful of peanut butter (or our homemade nut butter if you’re feeling fancy!), add some chopped strawberries and raspberries, and a few chopped peanuts for crunch. It’s pure nostalgia!
Chocolate Banana Bread Overnight Oats
This is seriously decadent, but still good for you! Stir ½ mashed banana, 1 teaspoon of cocoa powder, ¼ teaspoon cinnamon, and a pinch of nutmeg into your base mixture before chilling. Top with banana slices, chopped walnuts, and a few chocolate chips. It tastes just like a slice of chocolate banana bread!
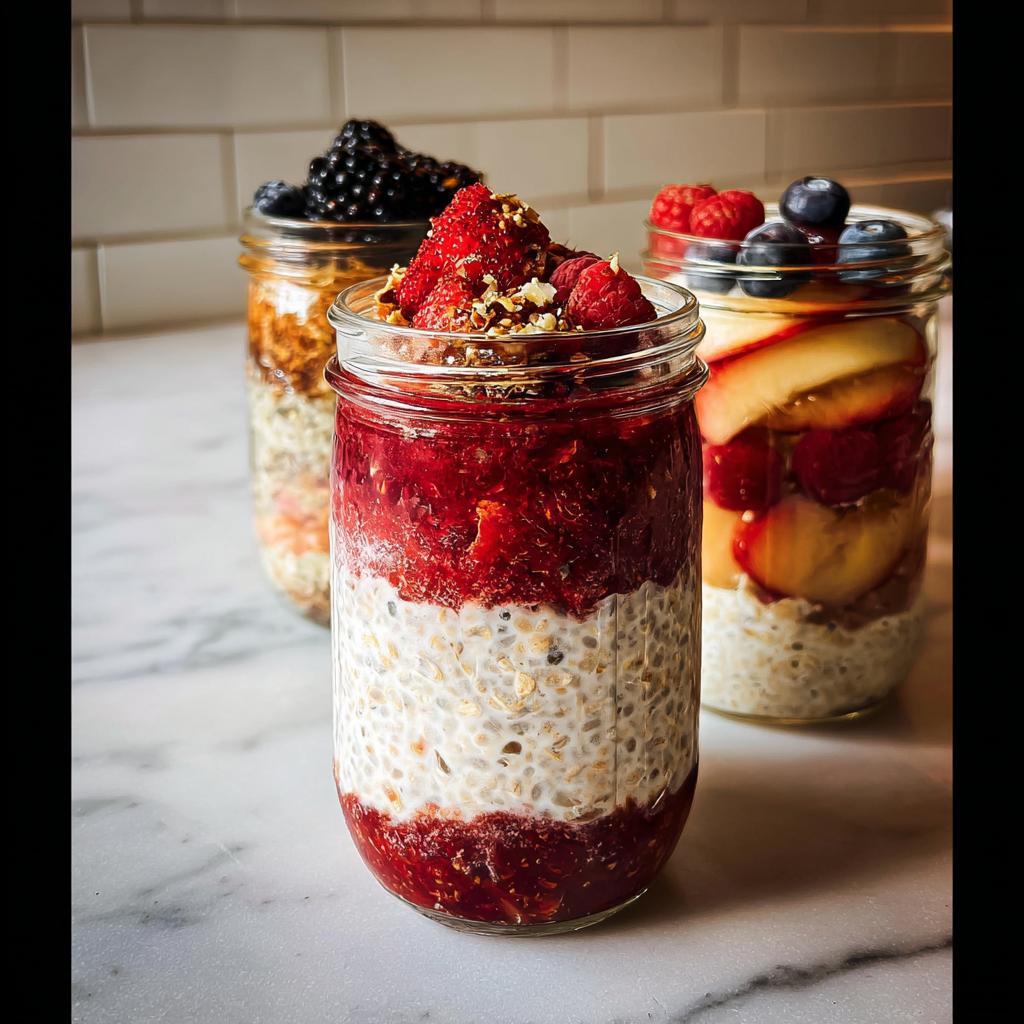
Homemade Chia Jam Recipe
This stuff is SO easy and way better than store-bought. In a small saucepan over low heat, combine 1 pound of strawberries, ½ teaspoon lemon juice, 1 teaspoon maple syrup, and a pinch of salt. Cook, stirring, for about 3-5 minutes until they soften. Mash ‘em up with a fork, keeping some texture. Then, stir in 3 tablespoons of chia seeds. Let it cool a bit, then pop it in a jar in the fridge. It thickens up beautifully and is perfect with fruit!
Tips for Success with Healthy Meals Recipes
You know, making these healthy meals really doesn’t have to be complicated! A few little tricks can make all the difference between a “meh” meal and a total game-changer for your week. It’s all about understanding those key ingredients and being a little flexible. Thinking about your food this way – as something you can whip up easily and enjoy – is the secret to sticking with it long-term.
Ingredient Notes and Substitutions
So, about those ingredients! Rolled oats are key for texture, but if you can’t find them, steel-cut oats *can* work in a pinch, though they’ll need a bit more liquid and might not be as creamy. For the milk, unsweetened almond milk is great, but any non-dairy milk like oat milk or soy milk works just fine. If you’re not a fan of Greek yogurt, a dairy-free yogurt or even just skipping it altogether is totally doable! And for sweetener, honey or even a sugar-free option can swap in for maple syrup, just adjust to your taste. These little tweaks mean you can make these recipes work for almost anyone!
Make-Ahead Strategies for Busy Lifestyles
Okay, so you’ve got the overnight oats down, which is awesome! But let’s talk about leveling up your whole meal prep game. I’ve learned over the years that having a system makes sticking to healthy eating so much easier, especially when life gets crazy busy. It’s not just about one meal; it’s about how you can weave in healthy choices throughout your week with a little smart planning. Batch cooking things like grains or chopped veggies on a Sunday can be a lifesaver, and portioning out snacks means you’re less likely to grab something unhealthy when hunger strikes. My own kitchen transformed when I started dedicating just a little time to prep, and trust me, it feels SO good to have healthy options ready to go! You can read more about how I tackle healthy eating and batch cooking over on my pasta recipes page too!
Storing Your Overnight Oats
Storing your overnight oats is super simple and keeps them tasting fresh for days. Once you’ve mixed up your base, just pop it into your lidded jar and straight into the fridge. They’re usually best within about 3-5 days. I like to prep a few jars at the beginning of the week so I have breakfast ready to grab every morning. Just make sure the lid is on tight so they don’t absorb any funky smells from the fridge. Honestly, they taste just as good on day 4 as they do on day 1!
Frequently Asked Questions About Healthy Meals Recipes
Got questions about whipping up these healthy meals or mastering meal prep? I’ve got you covered! It’s all about making this clean eating journey as smooth and tasty as possible.
Can I make overnight oats with different types of milk?
Oh, absolutely! You can totally swap out the almond milk for any milk you like – soy, oat, even regular dairy milk works wonders. Non-dairy options might give a slightly different texture, but they all taste delicious!
How long do overnight oats last in the refrigerator?
I find they’re best eaten within about 3 to 5 days. Just keep them sealed tight in their jars. Prep a few at the start of the week, and breakfast is sorted!
Are overnight oats truly healthy?
Yes, they really are! With whole rolled oats for fiber, chia seeds for healthy fats and protein, and whatever other fruits or nuts you add, they’re a super well-rounded, energizing breakfast that keeps you full and satisfied.
Equipment Needed for This Recipe
You don’t need much to make these amazing overnight oats! The main stars are a good old Mason jar or any lidded jar – whatever you have on hand works great for mixing and storing. You’ll also need a small saucepan if you’re making the chia jam from scratch, and just some basic measuring cups and spoons. That’s pretty much it!
Nutritional Information
So, here’s the general idea for the base overnight oats (just the oats, chia seeds, maple syrup, salt, and almond milk): you’re looking at around 250-300 calories, about 8-10g of fat, 10-12g of protein, and 40-45g of carbs. Adding yogurt, fruit, or nuts will change those numbers, of course! These figures are just estimates, so your mileage may vary depending on exactly what you toss in. It’s a fantastic way to power up your morning, though!
Share Your Healthy Meal Creations!
I’d absolutely LOVE to hear what you whip up with these recipes! Did you try a fun new variation on the overnight oats? Maybe you’ve got some brilliant make-ahead tips to share? Snap a pic and tag me, or drop a comment below – I can’t wait to see your delicious, healthy creations! You can always reach out through my contact page too!
Overnight Oats with Variations
Ingredients
Equipment
Method
- Make the base recipe: In a Mason jar or other lidded jar, place the oats, chia seeds, maple syrup, salt, and Greek yogurt, if using.
- Add the almond milk and stir until the mixture is well combined and there are no clumps of chia seeds at the bottom of the jar. Cover and refrigerate overnight, or for up to 5 days.
- In the morning, top with your desired toppings and serve with drizzles of maple syrup.
- For apple pie overnight oats, stir the applesauce and cinnamon into the overnight oat base. Refrigerate overnight. In the morning, top with diced apple, chopped pecans, and cinnamon apples and drizzles of maple syrup, if desired.
- For peach crisp overnight oats, make the plain overnight oat base. Refrigerate overnight. In the morning, top with peach slices, granola, and drizzles of maple syrup, if desired.
- For PB&J overnight oats, make the plain overnight oat base. Refrigerate overnight. In the morning, top with chia jam, peanut butter, chopped strawberries, raspberries, and chopped peanuts.
- For chocolate banana bread overnight oats, stir the mashed banana, cocoa powder, cinnamon, and nutmeg into the overnight oat base. Refrigerate overnight. In the morning, top with banana slices, chopped walnuts, chocolate chips, and drizzles of maple syrup, if desired.
- To make the chia jam: Place the strawberries, lemon juice, maple syrup, and salt in a small saucepan over low heat. Cook, stirring occasionally, for 3 to 5 minutes, or until softened. Use a fork or a potato masher to mash the strawberries, keeping a few a little chunky. Remove from the heat and stir in the chia seeds. Transfer to a jar and let cool, uncovered, at room temperature, then cover and chill in the fridge.
Notes
Tried this recipe?
Let us know how it was!
Ryan Cooper, Efficiency & Testing Coordinator
I’ve spent the past six years obsessed with making cooking easier, leading to my role as Efficiency & Testing Coordinator at Low Carb Recipe Journal. My food science and ingredient analysis background helps me create low-carb recipes that actually work in real kitchens—without fancy equipment or chef-level skills.
My journey started at Mountain View Culinary Institute in kitchen operations, where I became fascinated by why some recipes fail and others succeed. I discovered my talent for spotting unnecessarily complicated cooking processes and simplifying them without losing quality. Working with restaurant chains and meal delivery services, I helped cut preparation times by 35% while maintaining delicious results.
I’ve shared my systematic approach with culinary schools and food science programs, developing testing methods now used by several meal prep companies. My “precision without perfection” philosophy drives me—amazing results shouldn’t require professional training or expensive gadgets.
This mindset stems from my love of competitive cooking and ultralight backpacking, where every step must count and simplicity is everything. I apply these same principles when testing recipes, ensuring success with standard home kitchen tools.
When I’m not testing endless recipe variations in my Denver kitchen, I’m hiking Colorado’s trails, building custom kitchen storage solutions in my woodworking shop, or spending time with my three rescue cats—Sage, Basil, and Pepper.
At Low Carb Recipe Journal, I ensure every published recipe has been thoroughly tested for reliability and ease. My goal is simple: turn complex nutritional goals into achievable daily wins that build your confidence in the kitchen.