There’s just something magical about pizza night, isn’t there? It’s that perfect blend of delicious food, easy cleanup, and pure, unadulterated family fun. Honestly, knowing Why Everyone Loves This Pizza Night Recipes (+ Make-Ahead Tips) can transform a weeknight into a festive celebration! Growing up, pizza night was our absolute highlight. My family would gather around the kitchen table, everyone choosing their own toppings, laughing as my little brother once overloaded his pizza with way too much pineapple – Dad’s expression was unforgettable! Now, I love sharing that same joy with friends, and these make-ahead tips make it super easy, even when life gets crazy busy. It’s all about creating those special moments, one cheesy slice at a time.
Why Everyone Loves This Pizza Night Recipes (+ Make-Ahead Tips)
Okay, so why is this pizza recipe a total winner? It’s more than just dough, sauce, and cheese, right? It’s about creating that *perfect* pizza night experience that brings the whole family together for some serious fun. This isn’t just any recipe; it’s a ticket to uncomplicated joy and deliciousness. We all know how hectic life can get, so the fact that you can get a head start with the make-ahead dough is a game-changer. It means less stress for you and more time to actually enjoy the pizza-making process with your loved ones. Trust me, the simple, classic flavors and the sheer joy of building your own pie are what make this a go-to for memorable pizza nights, every single time! For more amazing pizza ideas, check out some other fantastic pizza recipes, and remember, the best part about making pizza at home is you can always find inspiration right here at our home base.
Gather Your Ingredients for the Perfect Pizza Night
Alright, let’s get down to business! To make that amazing pizza night happen, you’ll need just a few key players. For the crust, we’re keeping it simple with pantry staples that work like magic. And for the toppings? We’re going classic Margherita, focusing on quality ingredients that really sing. Don’t rush this part – grabbing the good stuff makes all the difference!
For the Pizza Dough
You’ll need 500 grams of all-purpose flour (plus extra for dusting, of course!), just 1 gram of active dry yeast (that’s about 1/4 teaspoon, easy peasy!), 16 grams of fine sea salt (around 2 teaspoons), and about 350 grams of water (or 1 1/2 cups).
For Assembling and Baking the Margherita Pie
Grab 4 balls of our glorious pizza dough. Then, you’ll want one 28-ounce can of the best peeled Italian tomatoes you can find, or go fresh with Roma tomatoes if they’re in season. We’ll need 2 tablespoons of extra-virgin olive oil, another 1 teaspoon of fine sea salt for the sauce, about 2 pounds of fresh mozzarella cheese torn into lovely chunks, a good handful of fresh basil leaves (around 20, or more if you’re a basil fanatic!), and 3/4 cup of finely grated Parmigiano-Reggiano cheese.
Step-by-Step Guide to Your Pizza Night Recipes
Alright, let’s get our hands a little floured and bring these pizzas to life! It’s honestly the best part, and seeing the dough come together is so satisfying. Remember, a little patience goes a long way, especially with dough. And if you’re using the make-ahead method, you’ve already won half the battle!
Preparing the Pizza Dough
First things first, let’s make that glorious dough. Grab a big bowl and toss in your flour, that tiny bit of yeast, and the salt. Now, slowly pour in the water and just mix until it looks like a shaggy mess – don’t worry, that’s normal! Turn it out onto a lightly floured counter and get ready to knead. You’ll want to do this for about 10 to 15 minutes until it’s smooth and stretchy, like a little bit of magic. Pop it into a lightly oiled bowl, cover it up, and let it hang out in a warm spot for 1-2 hours until it’s doubled in size. If you’re making it ahead, just punch it down after it rises, cover it super tight, and pop it in the fridge for up to 24 hours. Just remember to pull it out about an hour before you plan to shape it so it can relax.
Assembling and Baking Your Pizza
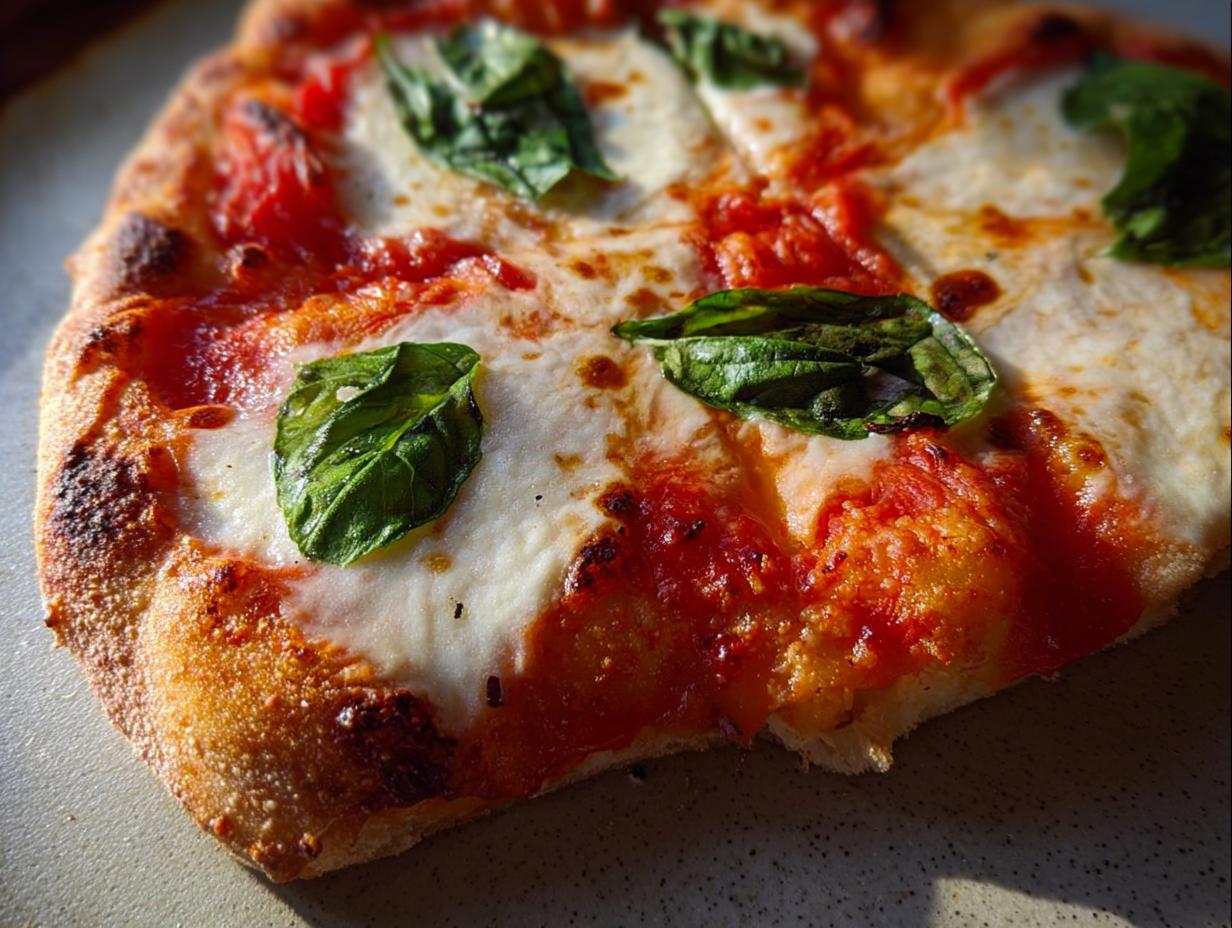
Now for the really fun part! Get your oven screaming hot – as high as it will go, ideally 500°F (260°C). Make sure you’ve got a baking sheet or a fancy pizza stone in there getting nice and toasty. While it heats up, drain those canned tomatoes and give them a good squish with your hands or a fork. Stir in the olive oil and that teaspoon of salt. See? Easy sauce! Now, take your lovely dough balls and gently shape them into pizza rounds on your floured surface. Don’t aim for perfection here; rustic is totally in. Spread a thin layer of that tomato sauce on each base, leaving a little border for that perfect crispy crust. Next, scatter the torn mozzarella all over.  Carefully slide your pizzas onto that super hot baking sheet or stone. Bake for about 10-15 minutes. You’re looking for a golden-brown crust and bubbly, slightly browned cheese. Oh, and if you want to see a similar process with flatbread, check out this wheat pancake recipe – totally different, but the dough handling is kinda similar!
Once they’re out, scatter on your fresh basil leaves and a little sprinkle of Parmigiano-Reggiano.  Slice it up and dig in!
Tips for Success with Your Pizza Night Recipes
Okay, you’ve got the dough ready, the sauce is prepped, and the oven is preheating – almost there! A few little tricks can really elevate your pizza night from good to absolutely spectacular. First off, really crank up that oven! Don’t be shy with the heat; a super hot oven is key to that amazing, slightly charred crust. When you’re handling the dough, try to be gentle. Overworking it after the first rise can make it tough. Instead, think of it as coaxing it into shape.  And for toppings? Less is often more, so you can really taste the quality of each ingredient. Don’t forget to sprinkle on that Parmigiano-Reggiano *after* baking for the best flavor!
Make-Ahead Magic for Effortless Pizza Nights
You know, life gets crazy sometimes, right? That’s where the make-ahead magic really shines. Having your pizza dough ready to go in the fridge is like a secret weapon for busy weeknights or when you’ve got unexpected guests popping over. It takes so much of the last-minute stress away, letting you focus on the fun part – assembling and devouring! Plus, I’ve found that overnight (or even up to 24 hours) in the fridge really lets the flavors develop beautifully. 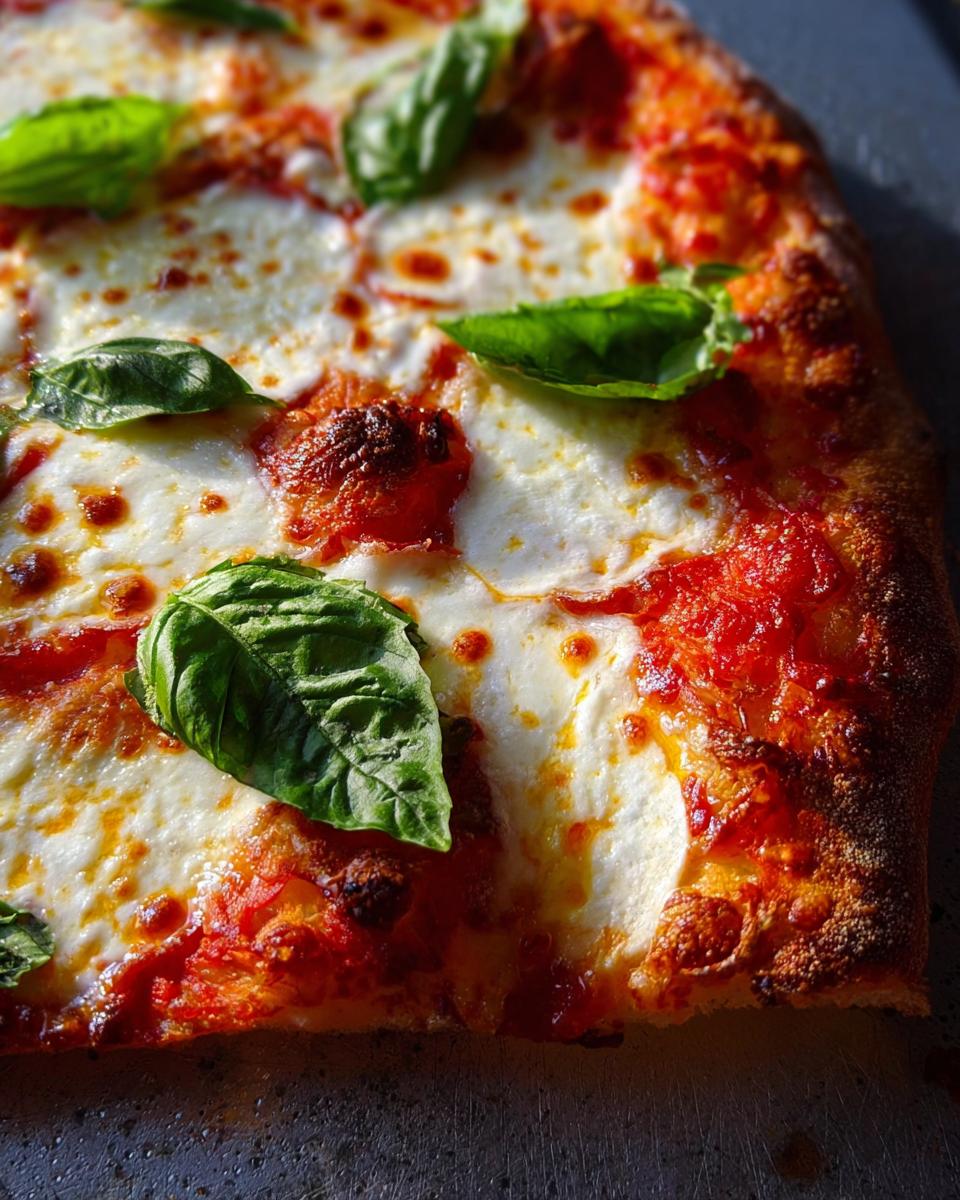 It’s amazing how a little bit of planning can turn a chaotic evening into a super chill and delicious pizza party. For more ideas on making life easier with make-ahead meals, check out some other great options from our site!
Frequently Asked Questions About Pizza Night Recipes
Got questions about making the best pizza at home? You’re in the right spot! We’ve all been there, wondering about the little details that make a pizza night truly amazing. Let’s dive into some common queries to make your pizza-making journey even smoother and more fun! Feel free to reach out if you have more; you can always contact us!
Can I freeze the pizza dough?
Absolutely! You can freeze the dough after it has risen and been punched down. Wrap it super tightly in plastic wrap, then place it in a freezer-safe bag. Thaw it overnight in the fridge and let it come to room temperature for about an hour before shaping. Works like a charm!
What are some other topping ideas for pizza night?
Oh, the possibilities are endless and that’s part of the fun! Beyond the classic Margherita, think about spicy pepperoni, earthy mushrooms, sweet bell peppers, tangy olives, or even some prosciutto and arugula added after baking. Get creative and make it your own!
How do I get a crispy pizza crust?
The secret is a super hot oven (like we mentioned, 500°F or higher!) and preheating your baking sheet or pizza stone thoroughly. Make sure your dough isn’t too thick, and don’t overload it with toppings, as that can make the crust soggy. A good, hot surface is your best friend here!
Estimated Nutritional Information
Now, let’s talk numbers, but remember these are just estimates since everyone’s pizza might look a little different! Based on the ingredients for one Margherita pizza, you’re looking at roughly [Insert Estimated Calories Here] calories, packed with about [Insert Estimated Fat Here]g of fat, [Insert Estimated Protein Here]g of protein, and [Insert Estimated Carbs Here]g of carbs. This can totally change depending on your toppings, so consider these a tasty guideline!
Share Your Pizza Night Creations!
Loved making this pizza? We’d absolutely adore seeing your creations! Snap a pic of your masterpiece and share it with us! Leave a comment below to let us know how it turned out, or give the recipe a rating. You can also tag us on social media – we love seeing your delicious pizza nights in action! For more kitchen adventures, check out our latest blog posts!

Why Everyone Loves This Pizza Night Recipes (+ Make-Ahead Tips)
Ingredients
Equipment
Method
- For the dough: In a large bowl, combine flour, yeast, and salt. Gradually add water and mix until a shaggy dough forms. Turn out onto a lightly floured surface and knead for 10-15 minutes until smooth and elastic. Place in a lightly oiled bowl, cover, and let rise in a warm place for 1-2 hours, or until doubled in size. For make-ahead, punch down the dough, cover tightly, and refrigerate for up to 24 hours. Bring to room temperature for 1 hour before shaping.
- For assembling and baking: Preheat your oven to its highest setting, ideally 500°F (260°C), with a baking sheet or pizza stone inside.
- Drain the canned tomatoes and crush them with your hands or a fork. Stir in olive oil and salt.
- Divide the dough into 4 equal portions. On a lightly floured surface, shape each portion into a round pizza base.
- Spread a thin layer of the crushed tomatoes over each pizza base, leaving a small border for the crust.
- Distribute the torn mozzarella cheese evenly over the tomato sauce.
- Carefully transfer the pizzas to the preheated baking sheet or pizza stone in the oven.
- Bake for 10-15 minutes, or until the crust is golden brown and the cheese is bubbly and slightly browned.
- Remove the pizzas from the oven. Top with fresh basil leaves and a sprinkle of Parmigiano-Reggiano cheese before slicing and serving.
Notes
Tried this recipe?
Let us know how it was!
Maya Patel, Community Manager & Adaptation Specialist
I’ve spent the past five years working in community-focused nutrition, passionate about making low-carb eating accessible to everyone regardless of cultural background. With certification in cross-cultural nutrition counseling, I help people adapt healthy eating approaches while preserving their cherished food traditions.
My journey began as a community outreach coordinator when I noticed how nutrition advice often ignored people’s cultural food practices. This frustrated me—why should someone abandon their grandmother’s recipes to be healthy? I started developing ways to adapt traditional dishes from different cultures to fit therapeutic nutrition goals, helping hundreds of families integrate low-carb principles without losing their culinary heritage.
As a second-generation Indian-American, this is deeply personal. I’ve balanced my family’s food traditions with modern nutrition research, especially when adopting a low-carb approach to manage my PCOS. That experience taught me that sustainable health changes must honor who you are and where you come from.
My “inclusive wellness” philosophy is straightforward: there’s no one-size-fits-all approach to healthy eating. Whether developing vegetarian keto adaptations for traditional Indian flavors or creating community spaces for sharing cultural recipe modifications, I believe everyone deserves respect and support in their wellness journey.
When I’m not facilitating online discussions or testing cultural adaptations in my Portland kitchen, I work with clay in my pottery studio or volunteer with local community gardens. I believe growing food together strengthens both community bonds and our connection to nourishing ingredients.
At Low Carb Recipe Journal, I ensure our community remains welcoming for readers from all backgrounds while developing practical ways to adapt recipes for different cultural preferences and dietary needs. My goal is making low-carb eating culturally celebratory, not restrictive.