There’s something truly magical about pulling a homemade cake out of the oven, isn’t there? That first whiff of sweet, buttery goodness just wraps around you like a warm hug. But if you’re new to the kitchen, the idea of baking a cake can feel a little… intimidating. Trust me, I get it! I still remember the thrill of baking my first cake; it was a simple vanilla sponge for my sister’s birthday. Armed with a handwritten recipe from my grandmother, I mixed, measured, and fretted over every ingredient. When that cake finally came out of the oven—golden and fragrant—I felt like a baking prodigy. I decorated it clumsily with whipped cream and sprinkles, but when we sliced into it, the smiles around the table made every moment in the kitchen worthwhile. That experience ignited my passion for cake baking, teaching me that every baker starts somewhere. That’s why I created The Ultimate Cake Ideas Recipes Guide for Beginners – to make your first cake a triumph!
Why This Peach Upside Down Cake is Perfect for Beginners
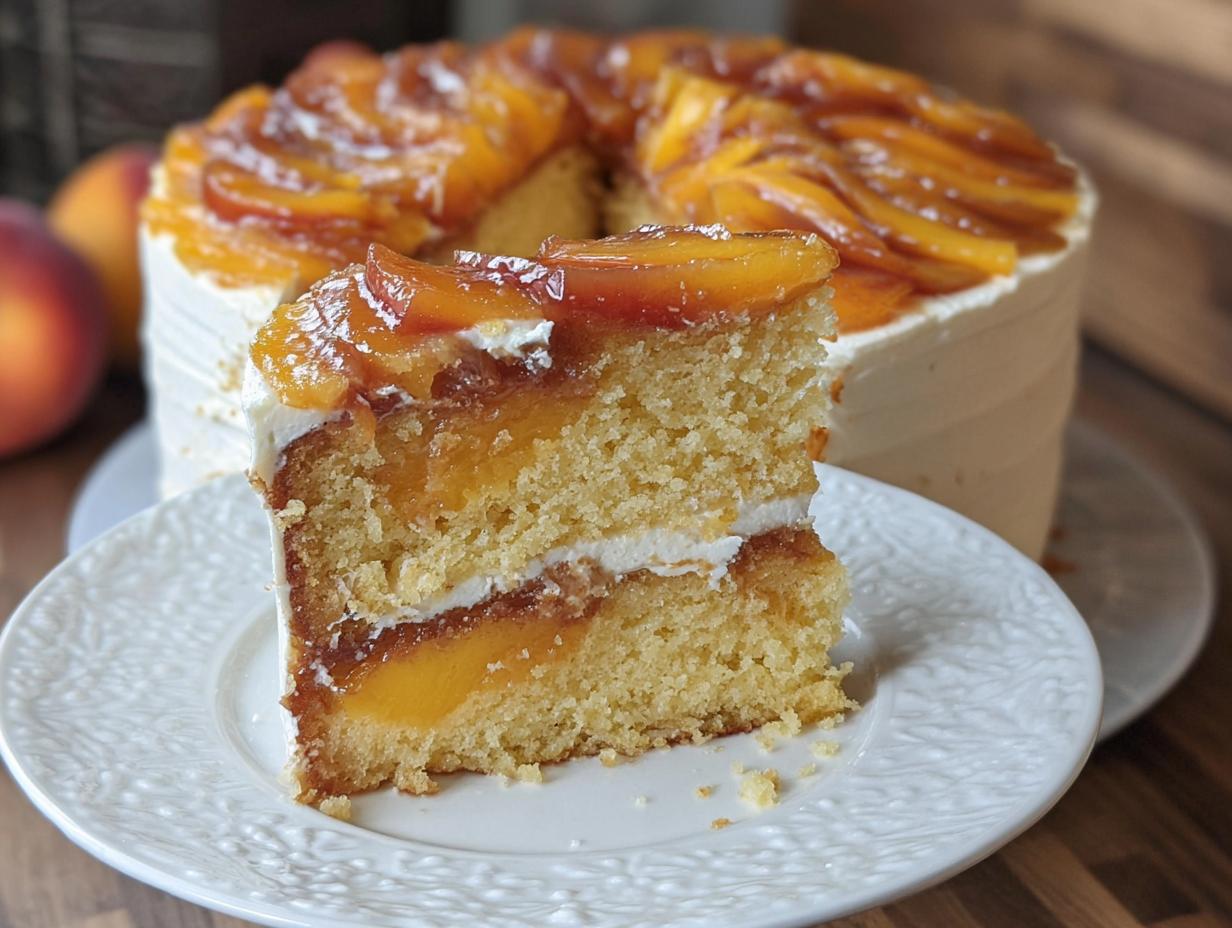
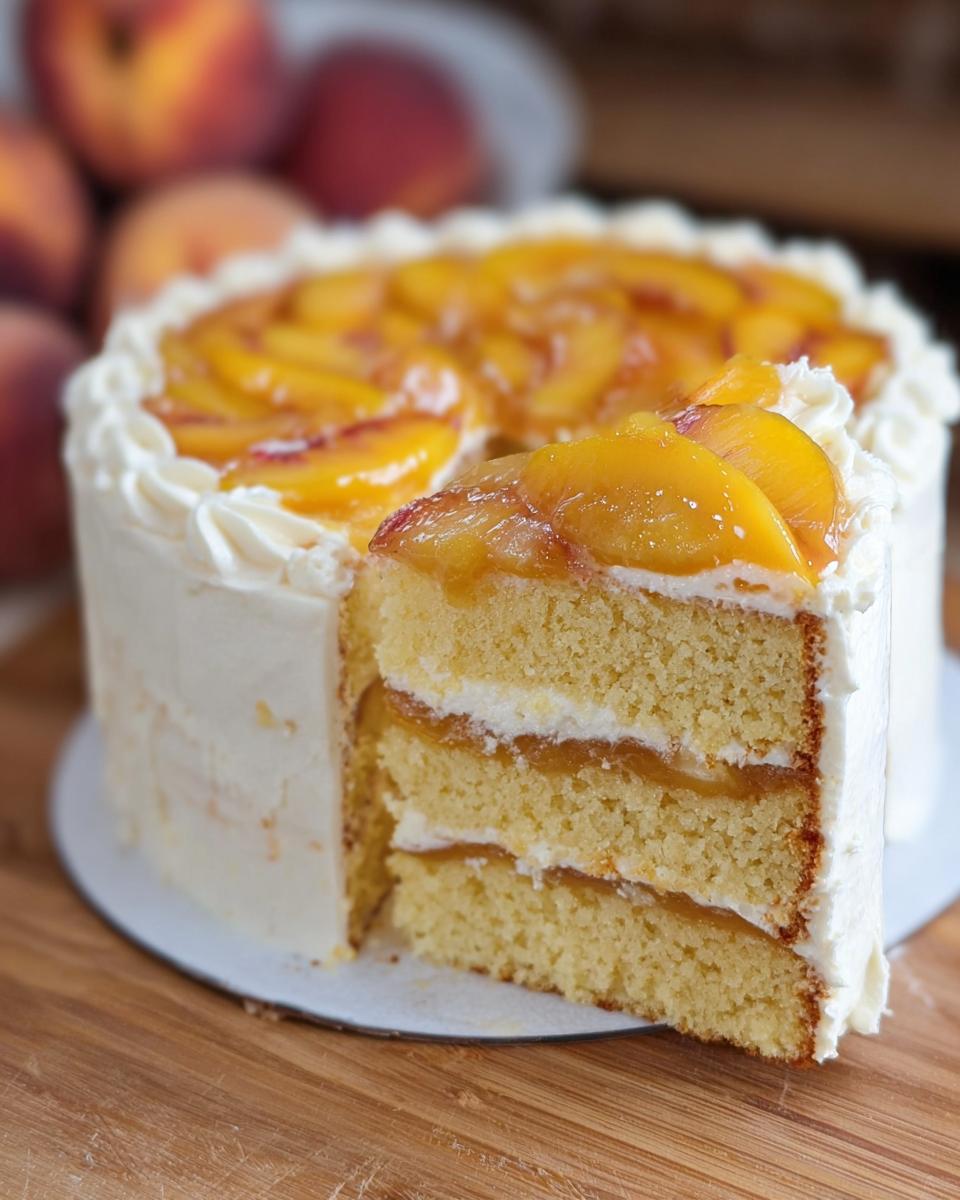
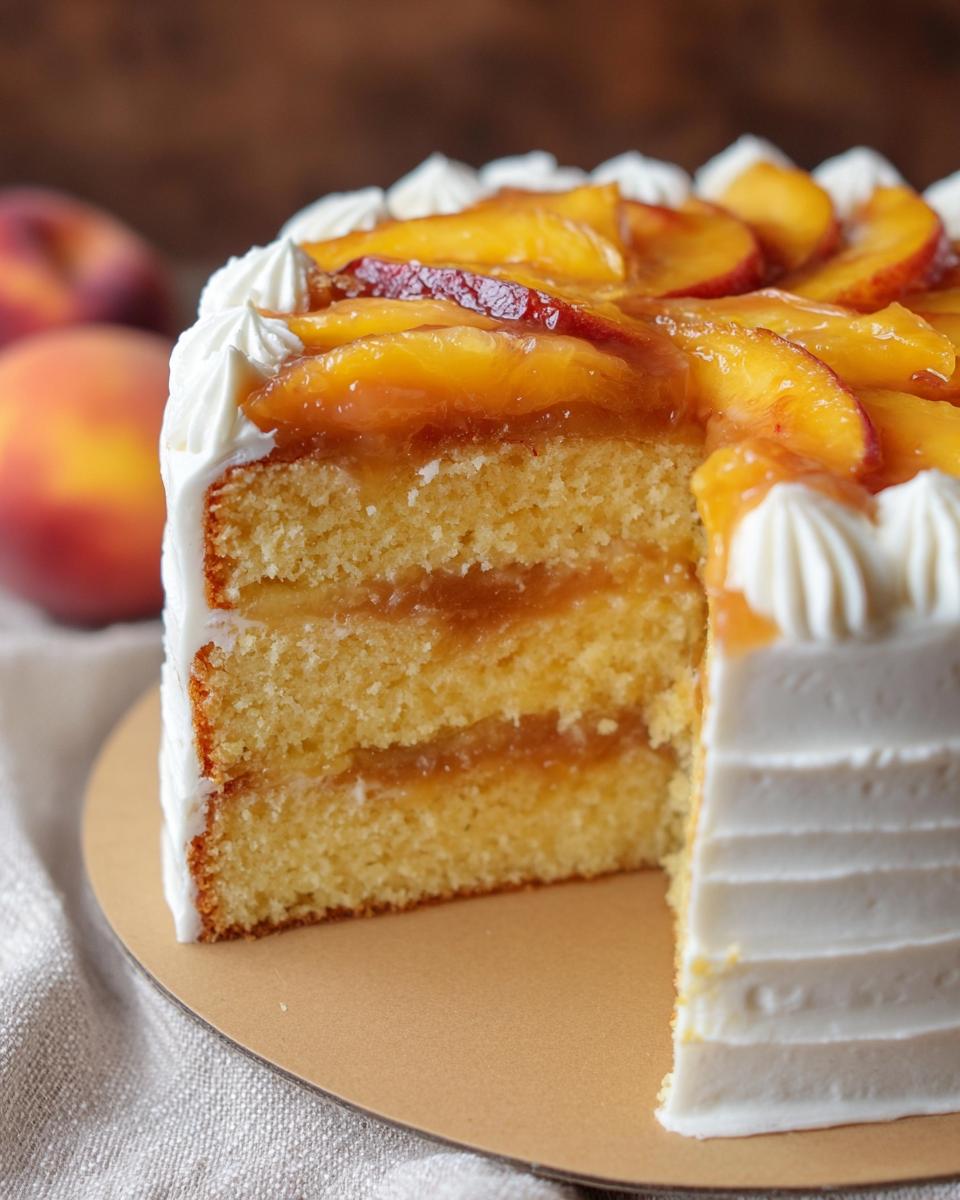
Alright, let’s talk about why this Peach Upside Down Cake is your new baking best friend! Sometimes, recipes can feel like a complicated dance, but this one? It’s more like a gentle waltz. We’re using ingredients you probably already have in your pantry, and the instructions are so clear, you can literally follow along while humming your favorite tune. The best part is it’s super forgiving – even if you’re a little off on your measurements (oops!), the flavor is still going to be absolutely divine. Plus, the gorgeous fruit layer caramelizing on top? It looks fancy, but it’s actually one of the easiest parts to get right! This is exactly the kind of recipe that makes you feel like a baking rockstar right from the get-go. It’s a total win for anyone diving into The Ultimate Cake Ideas Recipes Guide for Beginners!
Gathering Your Ingredients for The Ultimate Cake Ideas Recipes Guide for Beginners
Okay, first things first! To make this amazing peach upside down cake, we need to gather our troops. Think of this as your delicious mission briefing. Don’t worry, these are all super common things you probably have lurking in your kitchen already! We’ll break it down so it’s super easy to see exactly what you need.
For that gorgeous, gooey Peach Brown Sugar Layer, you’ll want:
- 1/4 cup of unsalted butter, all melted up.
- 2/3 cup of brown sugar – the packed kind!
- And about 3 nice, ripe peaches, sliced up.
Next up is the fluffy Peach Yellow Cake itself. Get ready:
- 3 large eggs, just make sure they’re sitting out and are at room temperature.
- 2/3 cup of sour cream, also at room temperature.
- 1/3 cup of vegetable oil for that lightness.
- 2/3 cup of buttermilk, yep, room temperature is best here too.
- 1 teaspoon of good old vanilla extract.
- 1 teaspoon of cinnamon for that warm hug of spice.
- A little splash of peach flavoring if you have it – it’s optional but sooo good!
- And for the easiest part: one 15.25-ounce box of yellow cake mix. Seriously, it’s our secret weapon for a no-fuss cake!
And finally, for the dreamy Classic Vanilla Buttercream:
- 1 1/2 cups of unsalted butter, softened to perfection.
- Just a tiny pinch of salt to balance things out.
- 1 Tablespoon of vanilla extract – gotta have that classic flavor!
- 1/4 cup of heavy cream for that silky smooth texture.
- And about 7 to 8 cups of powdered sugar, depending on how sweet and thick you like it.
See? Totally doable! Having all these ready makes the whole process so much smoother.
Step-by-Step Instructions for The Ultimate Cake Ideas Recipes Guide for Beginners
Alright, baker extraordinaire! Let’s get this show on the road. Following these steps will have you baking like a pro in no time. Remember, taking your time and enjoying the process is half the fun! You can find more inspiration at bakingwithblondie.com.
Preparing the Cake Pans and Peach Layer
First things first, let’s get that oven warming up to 325 degrees F (160 degrees C). While it heats, grab your two 8-inch cake pans. Grease them really well with some shortening and then give them a good dusting of flour – this is our anti-stick shield! Now, take that melted butter and divide it between the two pans, brushing it all over the bottom. Sprinkle the brown sugar evenly over the butter, and then arrange your pretty peach slices on top of the sugar. It’s starting to look like a cake already!
Mixing the Peach Yellow Cake Batter
In a big bowl, let’s get those wet ingredients together – your room temperature eggs, sour cream, buttermilk, vegetable oil, vanilla extract, cinnamon, and that optional peach flavoring if you’re using it. Give them a good whisk until they’re all friends. Now, gently add in your yellow cake mix. Be careful here – we only want to stir until it’s *just* combined. Overmixing is the enemy of a tender cake, so go easy! Then, divide this lovely batter evenly between your two prepared pans.
Baking and Cooling the Cake Layers
Pop those pans into the preheated oven and let them bake for about 30 to 32 minutes. The best way to know if they’re done is the toothpick test – just stick a toothpick right into the center. If it comes out clean, they’re ready! Once they’re out of the oven, let them cool in the pans for a few minutes before carefully flipping them onto a wire rack to cool completely. Here’s a little trick for beginners: once they’re totally cool, wrap each cake layer snugly in plastic wrap and pop them in the freezer for at least 30 minutes. This makes them much firmer and easier to frost without crumbling!
Making the Classic Vanilla Buttercream
Time for the creamy, dreamy frosting! Grab your stand mixer with the paddle attachment. Cream that softened butter until it’s super light and fluffy. Add in your pinch of salt, that tablespoon of vanilla extract, and the heavy cream. Give it another good whip. Now, turn the mixer speed down to low and *slowly* start adding in the powdered sugar, a cup or two at a time. If it’s looking a bit too thick, just add another tablespoon or two of heavy cream to get it to a nice, spreadable consistency. Once all the sugar is in, crank the mixer up to high and beat it for a good 2 minutes until it’s wonderfully light and airy.
Assembling and Decorating Your Cake
Okay, the final frontier! Place a dab of your vanilla buttercream onto your cake board or serving plate – this acts like glue for your first layer. Carefully place one of your cooled cake layers, peach-side up, onto the board. Spread a generous layer of buttercream over the top. Now, apply a thin, even layer of frosting all around the sides of the cake. This is called a crumb coat, and it traps all those pesky crumbs. Pop it in the fridge for about 15-20 minutes to let that firm up. Once it’s set, add another nice layer of buttercream all around the sides. Then, using your cake turntable and that cool scallop cake comb, gently spin the cake and guide the comb to create a beautiful, textured finish!
Essential Equipment for The Ultimate Cake Ideas Recipes Guide for Beginners
So, you’ve got your ingredients and you’re ready to bake… but what about the tools? Don’t sweat it! For this peach upside down cake, you don’t need a whole professional bakery. But a few key things will make your life so much easier. You’ll definitely need those two 8-inch cake pans we talked about. A stand mixer is a lifesaver for whipping up that fluffy buttercream, but honestly, a good old-fashioned hand mixer or even some serious arm power can do the trick! If you’re planning on decorating like a pro, a cake turntable and a scallop cake comb are super fun to play with and make things look fancy with hardly any effort. And don’t forget a good old wire rack for cooling – it’s essential!
Tips for Baking Success with The Ultimate Cake Ideas Recipes Guide for Beginners
Okay, let’s talk about making sure your first cake is an absolute winner! As you work through The Ultimate Cake Ideas Recipes Guide for Beginners, keep these little bits of wisdom in mind. They’re not complicated, but they can make a world of difference! First off, room temperature ingredients are your best friend for cakes. That means your eggs, sour cream, and buttermilk should sit out for about 30 minutes before you start. This helps everything mix together smoothly, creating a nice, even batter. Trust me, it’s a game-changer for texture! Also, when you measure your flour, don’t scoop directly from the bag with your measuring cup! This packs too much flour in. Instead, gently spoon the flour into your cup and then level it off with a straight edge, like the back of a knife. It sounds small, but it stops your cake from becoming too dense. And if you’re not sure about your oven’s temperature, an oven thermometer is a cheap and cheerful way to make sure it’s accurate. For more baking tips and tricks, you might find great ideas over at lowcarbrecipejournal.com. Happy baking!
Frequently Asked Questions About The Ultimate Cake Ideas Recipes Guide for Beginners
Got questions? I’ve got answers! Baking should be fun, not frustrating, so let’s clear up any little doubts you might have as you dive into this recipe. If you ever need more help, don’t hesitate to reach out via our contact page!
Can I make this cake ahead of time?
Oh, absolutely! You can bake the cake layers a day or two in advance. Just make sure they’re completely cool, wrap them well in plastic wrap, and keep them at room temperature. The buttercream can also be made ahead and stored in an airtight container in the fridge for a few days. Just let it soften up a bit and give it a quick whip to bring it back to life before frosting!
What are some common beginner baking mistakes to avoid?
The biggest one is probably overmixing the batter – it can make your cake tough! Also, don’t skip the room temperature ingredients; they really do make a difference in how everything combines. And always, always preheat your oven properly! A wonky oven temperature can totally throw off your baking time. Oh, and try to resist opening the oven door too much while it’s baking, especially in the first 20 minutes!
How do I ensure my cake layers are even?
Great question! For level cakes, make sure you’ve divided your batter as evenly as possible between the pans. The freezing step helps a ton here because it firms up the cake, making it easier to handle and frost smoothly. If you find one layer is a bit domed, you can carefully shave off the top with a serrated knife *after* it’s completely cooled – just be gentle!
Storage and Reheating Instructions
So, you’ve got some delicious leftover peach upside down cake? Lucky you! Store any unfrosted cake slices tightly wrapped in plastic wrap at room temperature for a day or two. If it’s frosted, it’s best to keep it in an airtight container in the refrigerator – that buttercream will thank you! When you’re ready for a slice, you can enjoy it chilled, or gently warm a slice in the microwave for about 10-15 seconds. It just brings back that lovely, cakey warmth!
Estimated Nutritional Information
Just a heads-up, these numbers are estimates, okay? The exact calories, fat, protein, and carbs can totally change depending on the brands you use and the exact size of your peaches. But as a general idea, each slice of this yummy Peach Upside Down Cake with Vanilla Buttercream is roughly around 450-550 calories, with about 25-35g of fat, 5-8g of protein, and 50-60g of carbohydrates. Enjoy every bite!
Share Your Baking Journey
I would absolutely LOVE to hear about your baking adventure with this peach upside down cake! Did you try it? What did you think? Snap a pic and tag me on Instagram, or just leave a comment below telling me all about it! And if you enjoyed this recipe, please consider giving it a star rating – it really helps other home bakers find it. You can learn more about who we are here!
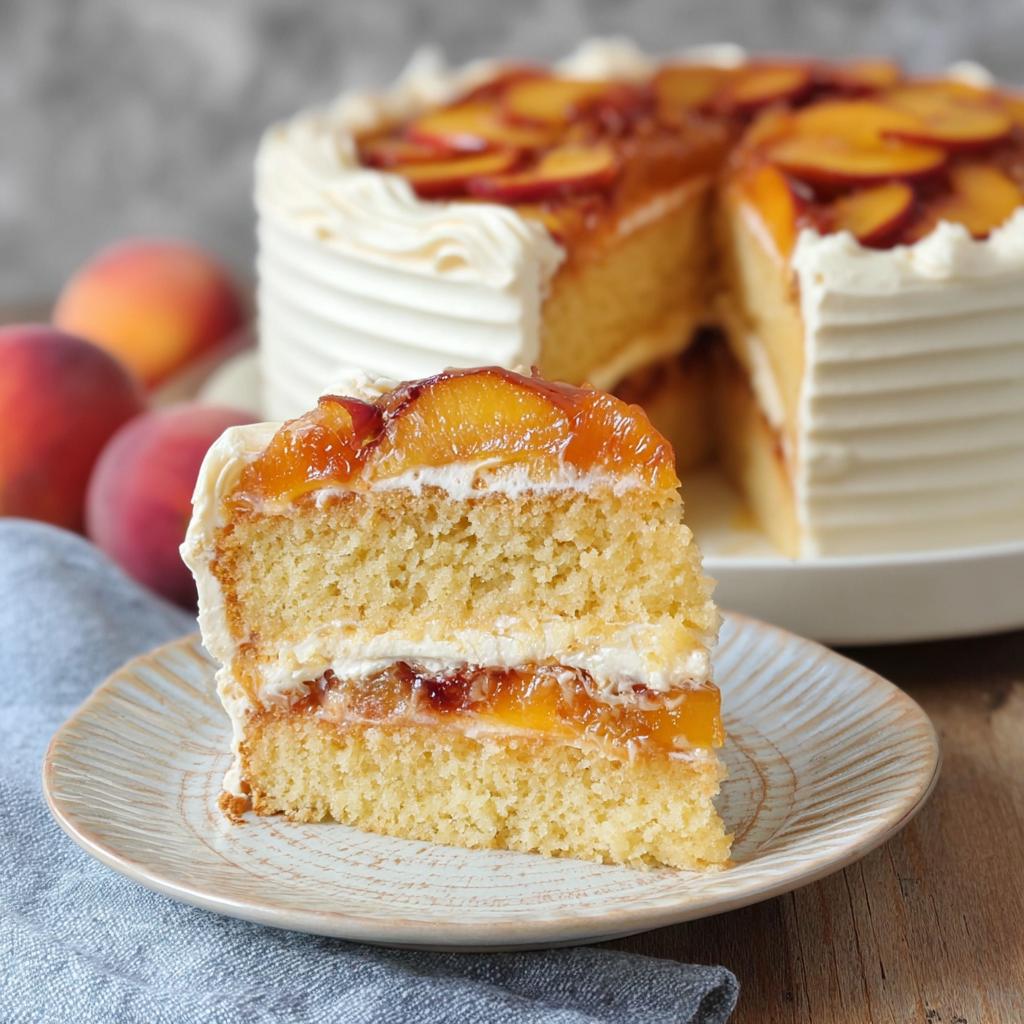
Peach Upside Down Cake with Vanilla Buttercream
Ingredients
Equipment
Method
- Preheat your oven to 325 degrees F (160 degrees C). Prepare two 8-inch cake pans by greasing them with shortening and dusting with flour to prevent sticking.
- Divide the melted butter evenly between the two cake pans, brushing it to cover the bottom. Distribute the brown sugar over the butter in each pan. Arrange the peach slices in an even layer on top of the brown sugar. Set the prepared pans aside.
- In a large bowl, whisk together all the cake ingredients except the cake mix. Add the cake mix and gently stir until just combined. Divide the cake batter evenly between the two prepared cake pans.
- Bake for 30-32 minutes, or until a toothpick inserted into the center comes out clean. Remove the cakes from the oven and carefully invert them onto a wire rack to cool completely. Once cooled, wrap each cake layer securely in plastic wrap and freeze for at least 30 minutes to make assembly easier.
- For the buttercream: In a stand mixer fitted with a paddle attachment, whip the softened butter until it is light and fluffy. Add the salt, vanilla extract, and heavy cream, and whip again. Scrape down the sides of the bowl.
- With the mixer on low speed, gradually add the powdered sugar. If the mixture is too thick, add 2-3 tablespoons more heavy cream to reach the desired consistency. Increase the mixer speed to high and beat for 2 minutes until the buttercream is light and fluffy.
- To assemble: Place a small amount of buttercream on a cake board or cardboard round to secure the first cake layer. Place one cake layer, fruit-side up, onto the board. Spread a layer of buttercream over the cake. Apply a thin layer of buttercream around the sides of the cake for a crumb coat, leaving the top exposed.
- Add another layer of buttercream around the sides of the cake. Using a cake turntable and a scalloped cake comb, carefully create a textured finish on the outside of the cake.
- Slice and enjoy your homemade peach upside down cake!
Notes
Tried this recipe?
Let us know how it was!
Ryan Cooper, Efficiency & Testing Coordinator
I’ve spent the past six years obsessed with making cooking easier, leading to my role as Efficiency & Testing Coordinator at Low Carb Recipe Journal. My food science and ingredient analysis background helps me create low-carb recipes that actually work in real kitchens—without fancy equipment or chef-level skills.
My journey started at Mountain View Culinary Institute in kitchen operations, where I became fascinated by why some recipes fail and others succeed. I discovered my talent for spotting unnecessarily complicated cooking processes and simplifying them without losing quality. Working with restaurant chains and meal delivery services, I helped cut preparation times by 35% while maintaining delicious results.
I’ve shared my systematic approach with culinary schools and food science programs, developing testing methods now used by several meal prep companies. My “precision without perfection” philosophy drives me—amazing results shouldn’t require professional training or expensive gadgets.
This mindset stems from my love of competitive cooking and ultralight backpacking, where every step must count and simplicity is everything. I apply these same principles when testing recipes, ensuring success with standard home kitchen tools.
When I’m not testing endless recipe variations in my Denver kitchen, I’m hiking Colorado’s trails, building custom kitchen storage solutions in my woodworking shop, or spending time with my three rescue cats—Sage, Basil, and Pepper.
At Low Carb Recipe Journal, I ensure every published recipe has been thoroughly tested for reliability and ease. My goal is simple: turn complex nutritional goals into achievable daily wins that build your confidence in the kitchen.