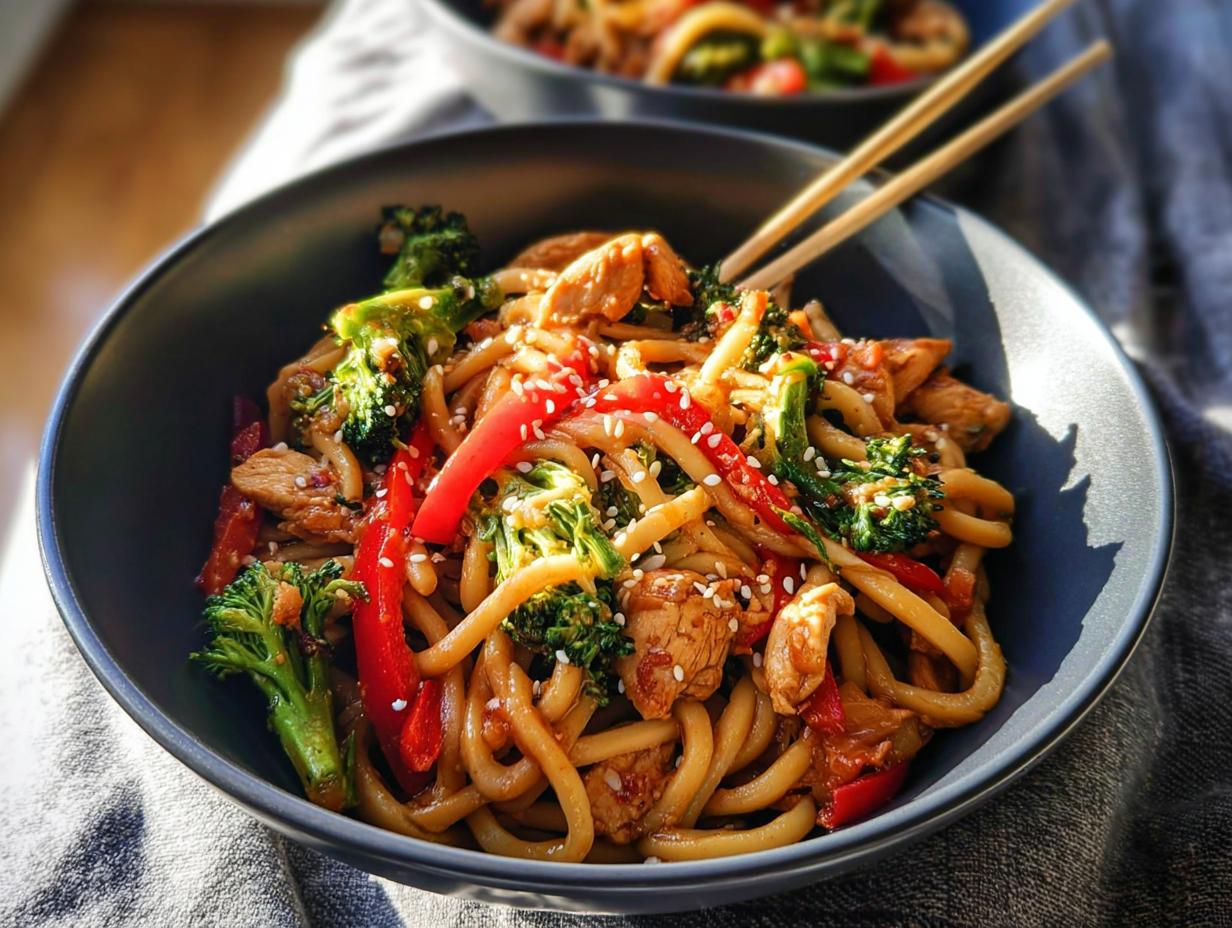
Oh, those busy weeknights, right? You know the drill – everyone’s hungry, time is short, and the last thing you want is a complicated meal. I totally get it! It reminds me of when I first became a mom. Dinner prep felt like a marathon, trying to keep everyone happy and fed. One night, I just threw together whatever I had in my pantry, and guess what? It turned into this amazing family favorite! That spontaneous meal taught me that simple ingredients can make pure magic on a plate. As a Community Manager & Adaptation Specialist, I learned to embrace this philosophy, crafting meals that are bursting with flavor but super fuss-free. That’s how the idea for our 20-Ingredient Easy Dinner Recipes (No Fuss) was born – making delicious, nourishing food totally achievable, even when life gets hectic. Trust me, these recipes are lifesavers!
Why You’ll Love These 20-Ingredient Easy Dinner Recipes (No Fuss)
Seriously, these recipes are a game-changer for anyone who loves good food but has zero time. They’re all about getting that amazing flavor without all the fuss. We’re talking about dinners that are so simple, even on your busiest nights, you’ll feel like a kitchen superhero. It’s proof that you don’t need a million ingredients to make something truly delicious that the whole family will gobble up!
-
Quick and Effortless Preparation
You’re looking at just 10 minutes of prep time and 15 minutes of cooking. How amazing is that? This means you can whip up a fantastic meal without breaking a sweat. It’s perfect for getting dinner on the table super fast, leaving you more time for, well, anything else!
-
Flavorful and Satisfying
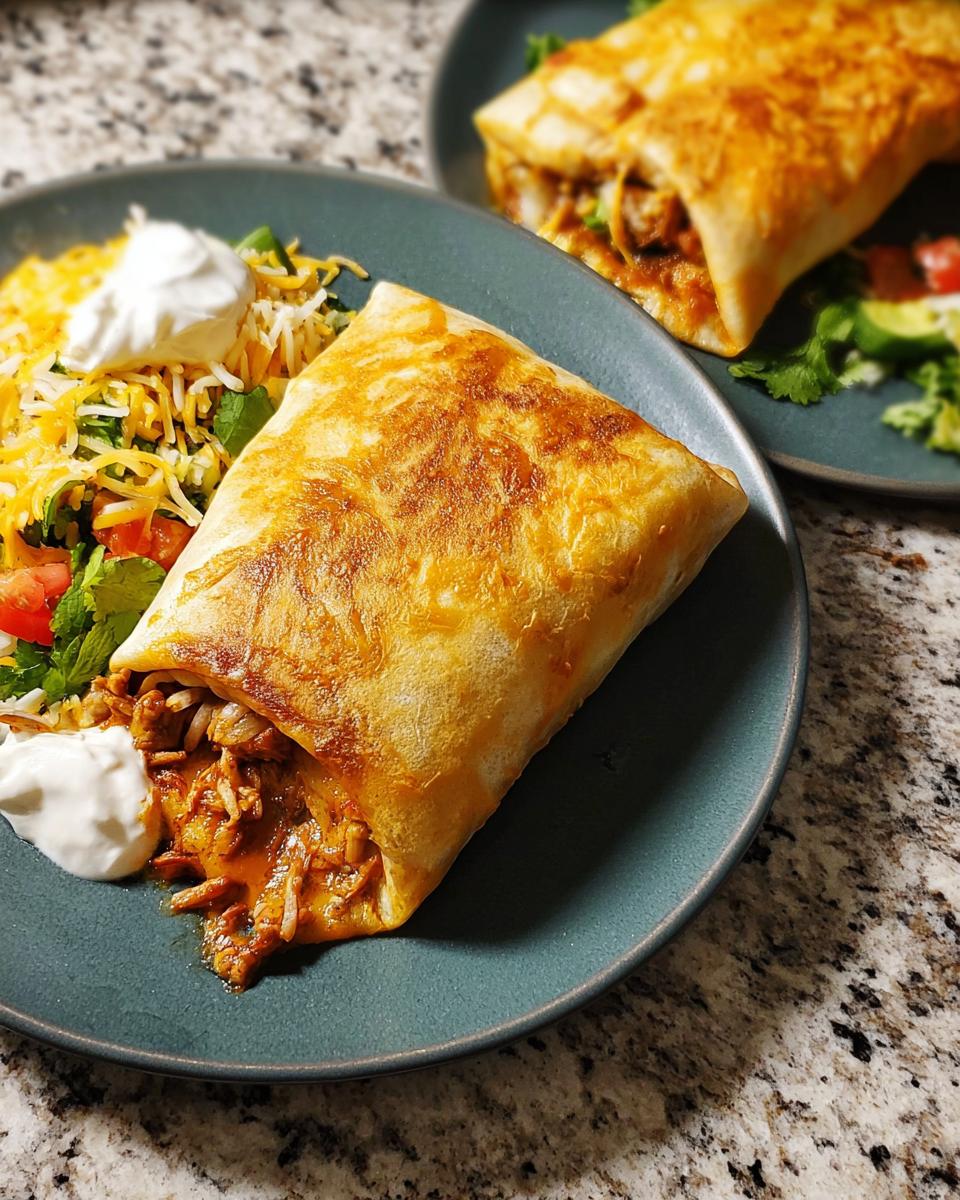
Don’t let the simplicity fool you! These easy dinners are packed with flavor. Think vibrant, satisfying meals that taste like you spent hours cooking. The Mexican-inspired chimichangas, for instance, are so zesty and delicious, everyone will be asking for seconds.
-
Minimal Ingredients, Maximum Taste
The real magic here is how much flavor we get from just a few key ingredients. This is the heart of our 20-Ingredient Easy Dinner Recipes (No Fuss) philosophy. No more staring into a full pantry and feeling uninspired – these recipes make every ingredient count!
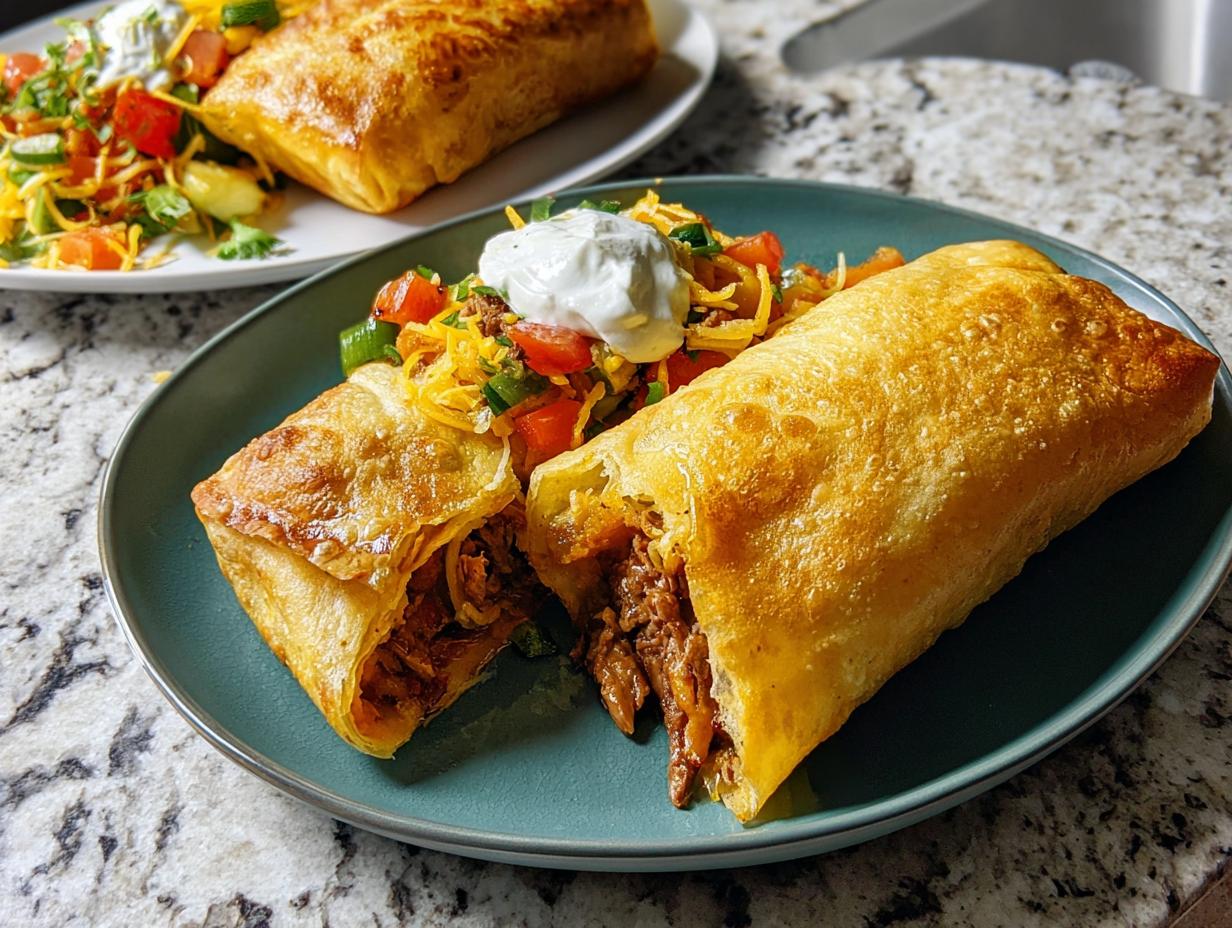
Gather Your Ingredients for Easy Chimichangas
Okay, let’s get our kitchen prepped for these fantastic easy dinners! For our Easy Chimichangas, we’re keeping things super simple, using ingredients you probably already have or can grab easily. I always like to have my cooked shredded meat ready to go – whether it’s leftover rotisserie chicken or some pulled pork I cooked up on the weekend. It makes this whole process even faster! We’re keeping the ingredient list short and sweet because, you know, they’re 20-Ingredient Easy Dinner Recipes (No Fuss), not a grocery store scavenger hunt! Don’t forget to check out our recipe for Sprouts Salad if you need a fresh side!
For the Filling
Here’s what you’ll need to get that delicious filling ready:
- 1/4 cup bacon grease or olive oil
- 2 cups shredded cooked beef, pork, or chicken
- 1 medium onion, diced
- 2 cloves garlic, minced
- 2 medium tomatoes, chopped
- 2 cans (4 ounces each) chopped green chiles
- 1 large peeled boiled potato, diced
- 1 teaspoon salt
- 1-1/2 teaspoon dried oregano
- 1 teaspoon chili powder
- 2 tablespoons minced fresh cilantro
For Assembly and Frying
These are the key players for making them into chimichangas:
- 12 flour tortillas (12 inches), warmed
- Oil for frying (about 2-3 inches deep in your skillet/fryer)
Optional Toppings
This is where you can really customize! Pile these on to your heart’s content:
- Shredded cheddar cheese
- Sour cream
- Guacamole
- Salsa
- Shredded lettuce
- Chopped tomatoes
- Lime wedges
Step-by-Step Guide to Making 20-Ingredient Easy Dinner Recipes (No Fuss)
Okay, let’s get cooking! Making these easy chimichangas is really straightforward, perfect for those nights when you just need a win in the kitchen. We’re sticking to the spirit of 20-Ingredient Easy Dinner Recipes (No Fuss) here, so it’s all about simple steps and great results. You can check out the full recipe details over at Taste of Home, but here’s my spin on how to get them perfect every time!
Prepare the Flavorful Filling
First things first, let’s build that amazing filling! Grab a large skillet and heat up your bacon grease or olive oil over medium heat. Toss in your diced onion and minced garlic, let them get nice and fragrant, about two minutes. Then, add your shredded cooked meat, chopped tomatoes, and those handy green chiles. Stir in the salt, oregano, chili powder, and cilantro. Let it all simmer together until the liquid has reduced down nicely – this concentrates all those yummy flavors. It only takes a couple of minutes!
Assemble and Roll Your Chimichangas
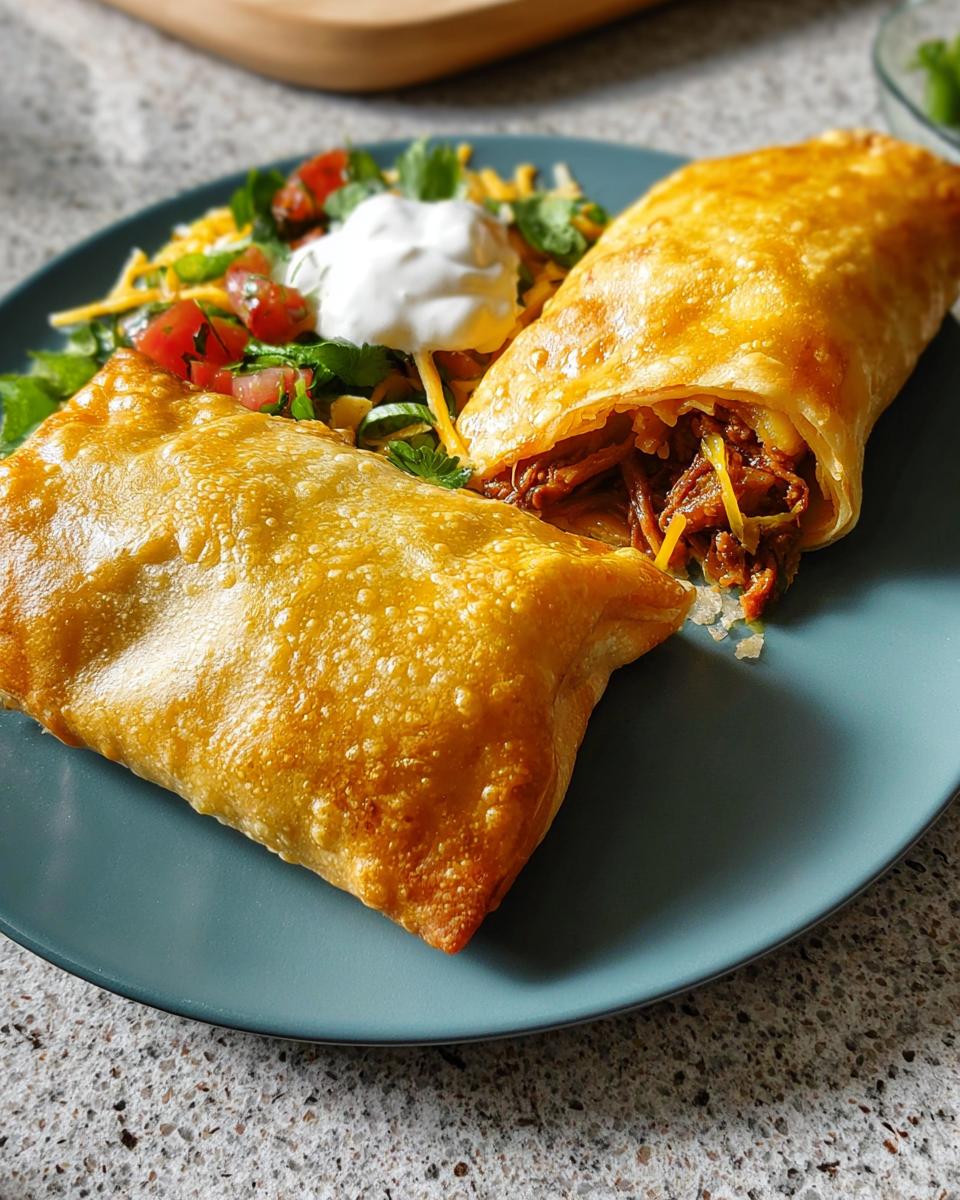
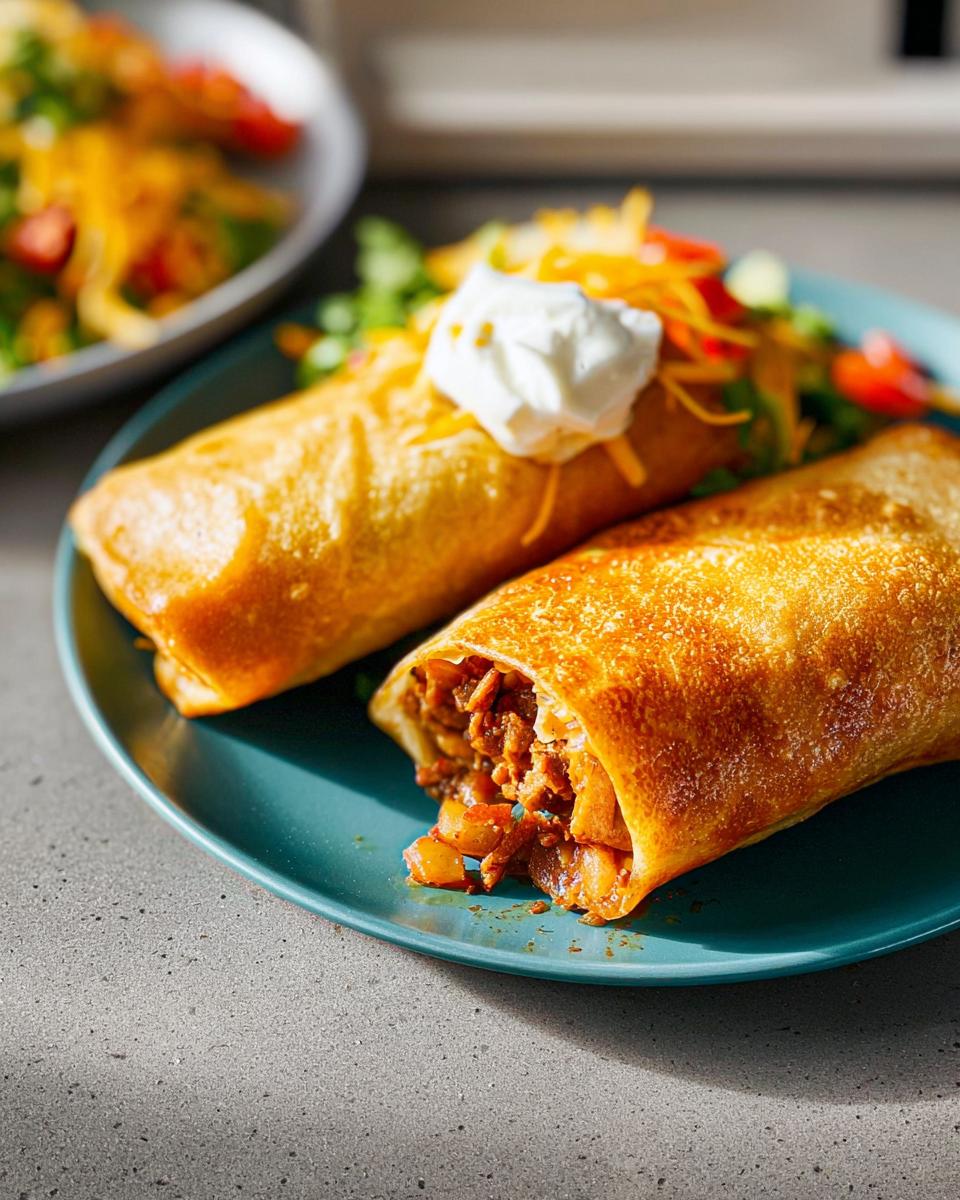
Now for the fun part: rolling them up! Make sure your tortillas are nice and warm – this makes them super pliable so they don’t tear. Lay one down flat, and spoon about half a cup of that delicious filling towards one edge. Fold up the edge closest to the filling, then fold in both sides like you’re wrapping a present. Finally, roll it up nice and tight. If you’re worried about them unrolling, a quick toothpick can help hold them shut for frying.
Fry to Golden Perfection
Time to get them crispy! Heat up your oil in an electric skillet or deep-fat fryer to about 375°F (190°C). Carefully place your rolled chimichangas into the hot oil, a few at a time so you don’t crowd the pan. Fry them for about 2-3 minutes per side, or until they’re beautifully golden brown and crispy all over. Use tongs to turn them gently. Once they’re perfect, lift them out and drain them on a plate lined with paper towels to catch any excess oil.
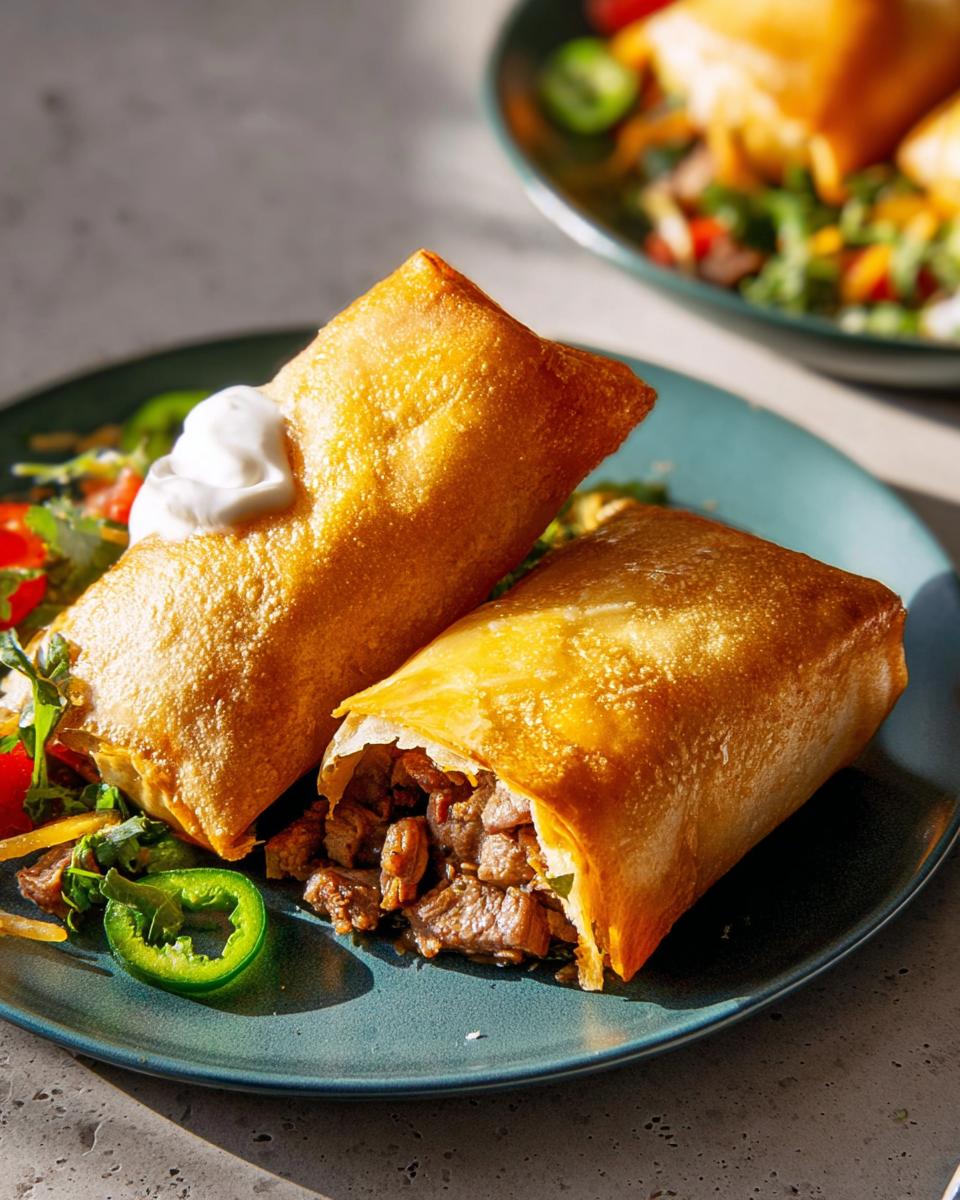
Serve and Enjoy
And there you have it! Your incredibly easy, super satisfying chimichangas are ready. Serve them up warm right away. Pile on your favorite optional toppings like shredded cheese, a dollop of sour cream, some fresh guacamole, salsa, or lettuce. A squeeze of lime is always a good idea too!
Tips for Success with Your Easy Dinner
Making these chimichangas is super forgiving, but a couple of little tricks really make them shine. It’s all about keeping things simple and delicious, exactly what our easy dinner philosophy is all about! These tips will help you nail that perfect crispy-fried exterior and satisfying, flavorful filling every single time.
Warming Tortillas is Key
Seriously, don’t skip warming your tortillas! When they’re warm, they become wonderfully soft and pliable, almost like a little edible blanket. This makes rolling them up so much easier without tearing, which is a lifesaver when you’re dealing with a hot filling. A quick zap in the microwave or a few seconds on a warm, dry skillet does the trick.
Don’t Overcrowd the Skillet
This is crucial for getting that beautiful golden-brown, crispy finish. When you drop too many chimichangas into the hot oil all at once, you dramatically lower the oil temperature. This means they end up soggy instead of crisp. Fry them in batches, giving each one enough space to bubble and get perfectly golden! Trust me, a little patience here makes all the difference.
Variations for Your 20-Ingredient Easy Dinner Recipes (No Fuss)
One of the best things about these 20-Ingredient Easy Dinner Recipes (No Fuss) is how adaptable they are! This chimichanga recipe is a fabulous base, and you can totally tweak it to fit whatever you have on hand or whatever you’re craving. Don’t feel locked into just one way to make them. If you’ve got leftover shredded chicken from Sunday dinner, throw it in! Maybe you’re not a fan of potatoes? No biggie, just leave them out. The goal is deliciousness without the stress, right?
If you love the idea of this but want to try something different, maybe check out our tasty pasta ideas for another super easy meal. But back to these chimis – you can also amp up the spice with a pinch of cayenne or some smoked paprika in the filling. For a vegetarian twist, skip the meat and use black beans, corn, and some seasoned sweet potato instead. It’s all about making it work for YOU!
Serving Suggestions for Family Meals
To make these delicious chimichangas a truly complete family meal, you can’t go wrong with some simple, fresh sides. They are just perfect for those hectic evenings when you need something fuss-free but super satisfying. My go-to is usually a big bowl of something cool and crisp to balance out the warm, savory chimichanga. Thinking about our Spinach Salad with Berry Vinaigrette always hits the spot and adds a lovely burst of color and flavor!
Storage and Reheating
Got leftovers? Lucky you! If you happen to have any of these amazing chimichangas that didn’t get gobbled up, storing them is a breeze. Once they’re cooled down a bit, tuck them into an airtight container or a resealable bag. They’ll keep nicely in the fridge for about 2-3 days. Now, for reheating, the goal is to get them crispy again. The best way I’ve found is to pop them in a preheated oven or an air fryer for a few minutes. Avoid the microwave if you can, unless you like them a little less crisp!
Frequently Asked Questions About Easy Dinners
Got questions about whipping up these easy dinners? You’re in luck! We’ve got you covered with answers to some common queries that pop up when you’re aiming for fuss-free, flavorful family meals. Getting dinner on the table shouldn’t be a puzzle! If you need more help or have other questions, feel free to reach out via our contact page!
Can I make the filling ahead of time?
Oh, absolutely! Making the filling ahead is a fantastic idea for your 20-Ingredient Easy Dinner Recipes (No Fuss). You can totally prep it a day or two in advance and store it in an airtight container in the fridge. Just scoop and roll when you’re ready to fry!
What’s the best way to keep chimichangas crispy after frying?
This is key! The absolute best way is to serve them immediately after frying. If you must keep them warm for a bit, an uncrowded, low-heat oven (around 200°F / 95°C) on a wire rack will help maintain some crispiness, but they’re truly best fresh!
Are there healthier alternatives to frying?
Definitely! While frying gives that classic crisp, you can bake them on a lightly oiled baking sheet at 400°F (200°C) for about 15-20 minutes, flipping halfway, or air fry them at 375°F (190°C) for 8-10 minutes. They won’t be quite as crispy as fried, but they’re still super tasty and a lighter option!
Nutritional Information (Estimated)
Just a friendly heads-up that these numbers are estimates and can change a bit depending on exactly what you use for your filling and toppings. But for one chimichanga (without extra toppings), you’re looking at around 343 calories, 13g fat, 16g protein, and 41g carbohydrates. Pretty good for such a quick and tasty meal, right?
Share Your Culinary Creations!
So, what did you think of these super easy chimichangas? Did you give them a whirl for your easy dinner tonight? I’d absolutely LOVE to hear all about it! Drop a comment below and tell me how they turned out, what toppings you used, or any fun twists you added. And if you snap a pic, tag us on social media – I live for seeing your kitchen wins!

Easy Chimichangas
Ingredients
Equipment
Method
- In a large skillet, heat bacon grease over medium heat. Add shredded meat, diced onion, minced garlic, chopped tomatoes, chopped green chiles, and diced potato. Stir in salt, dried oregano, chili powder, and minced cilantro. Simmer until the liquid has reduced, about 2 to 3 minutes.
- To assemble, place about 1/2 cup of the filling off-center on each warmed tortilla. Fold up the edge nearest the filling. Fold in both sides, then roll up the tortilla tightly. If needed, secure with a toothpick.
- In an electric skillet or deep-fat fryer, heat oil to 375°F (190°C). Carefully cook the chimichangas until golden brown on all sides, turning as needed. Drain on paper towels.
- Serve the chimichangas with your choice of optional toppings.
Nutrition
Notes
Tried this recipe?
Let us know how it was!
Maya Patel, Community Manager & Adaptation Specialist
I’ve spent the past five years working in community-focused nutrition, passionate about making low-carb eating accessible to everyone regardless of cultural background. With certification in cross-cultural nutrition counseling, I help people adapt healthy eating approaches while preserving their cherished food traditions.
My journey began as a community outreach coordinator when I noticed how nutrition advice often ignored people’s cultural food practices. This frustrated me—why should someone abandon their grandmother’s recipes to be healthy? I started developing ways to adapt traditional dishes from different cultures to fit therapeutic nutrition goals, helping hundreds of families integrate low-carb principles without losing their culinary heritage.
As a second-generation Indian-American, this is deeply personal. I’ve balanced my family’s food traditions with modern nutrition research, especially when adopting a low-carb approach to manage my PCOS. That experience taught me that sustainable health changes must honor who you are and where you come from.
My “inclusive wellness” philosophy is straightforward: there’s no one-size-fits-all approach to healthy eating. Whether developing vegetarian keto adaptations for traditional Indian flavors or creating community spaces for sharing cultural recipe modifications, I believe everyone deserves respect and support in their wellness journey.
When I’m not facilitating online discussions or testing cultural adaptations in my Portland kitchen, I work with clay in my pottery studio or volunteer with local community gardens. I believe growing food together strengthens both community bonds and our connection to nourishing ingredients.
At Low Carb Recipe Journal, I ensure our community remains welcoming for readers from all backgrounds while developing practical ways to adapt recipes for different cultural preferences and dietary needs. My goal is making low-carb eating culturally celebratory, not restrictive.